![]()
![]()
You need to send product to the Amazon warehouse so that Amazon can fulfill orders. This process is referenced as an "Amazon Inbound Shipment." These shipments are initiated and managed using the Transfer Builder and Manager.
|
Step |
Action |
|
1 |
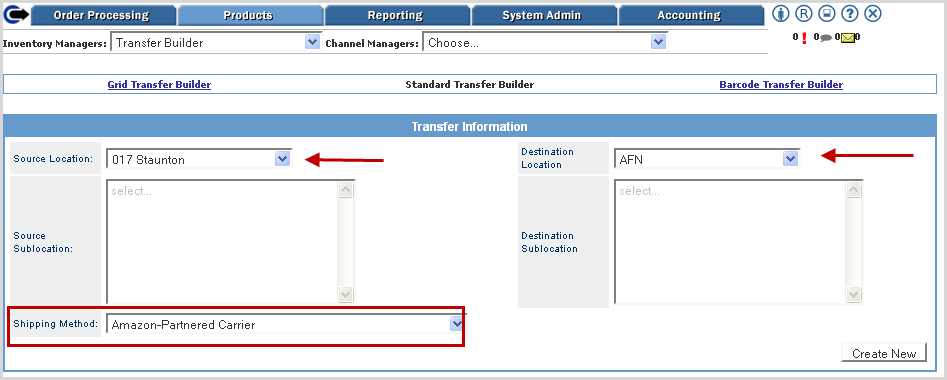
Select the appropriate source warehouse and "AFN" as the Destination Location. Select a shipping method from drop-down list. Choose the Amazon Partnered Carrier option if you want Amazon to generate a shipping label for the inbound shipment when using Amazon FBA shipping tool in Amazon Seller Central. Click on Create New.
Note: The Amazon-Partnered Carrier is an internal flag that can be assigned to the transfer so that it is identified that an Amazon shipping method will be selected for it from within Seller Central. |
|
2 |
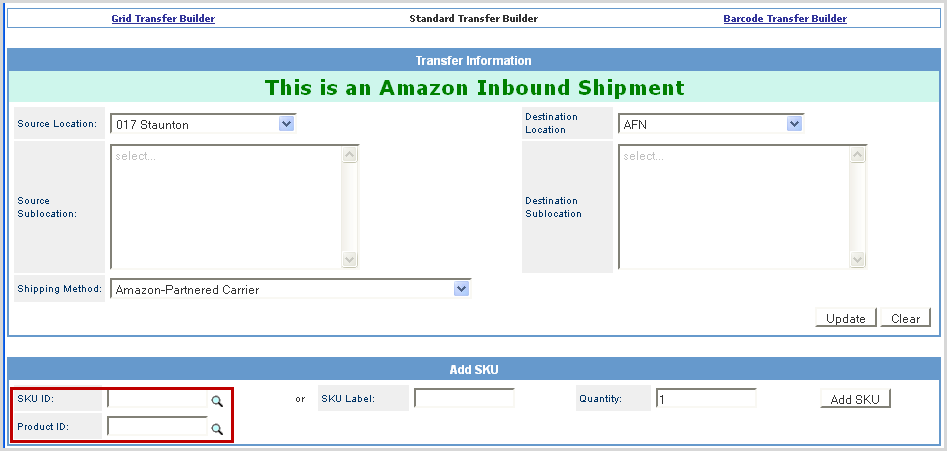
Use the SKU ID lookup to add items to the transfer. If the SKU ID is part of multiple products, include the appropriate Product ID for the items. Enter your quantity and click on Add SKU.
|
|
3 |
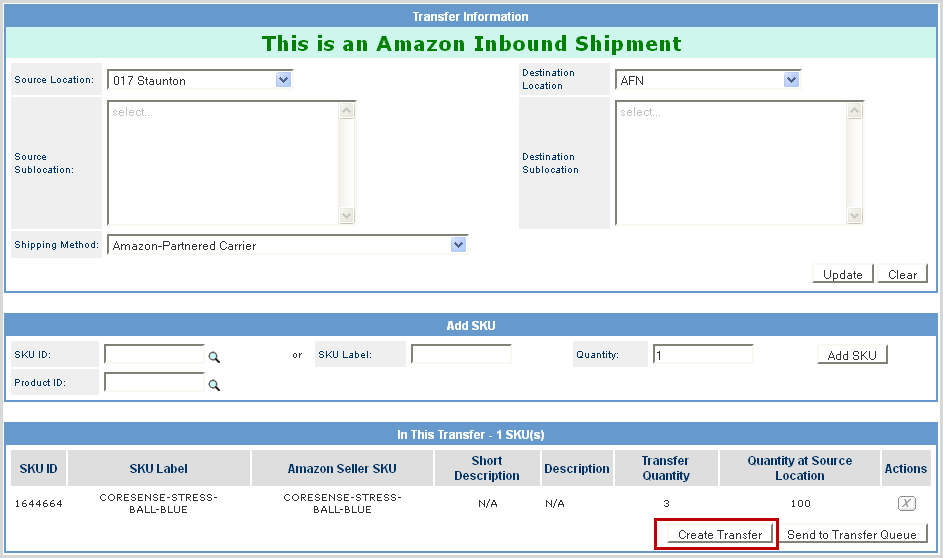
Once all product is added, click on the Create Transfer button.
|
|
4 |
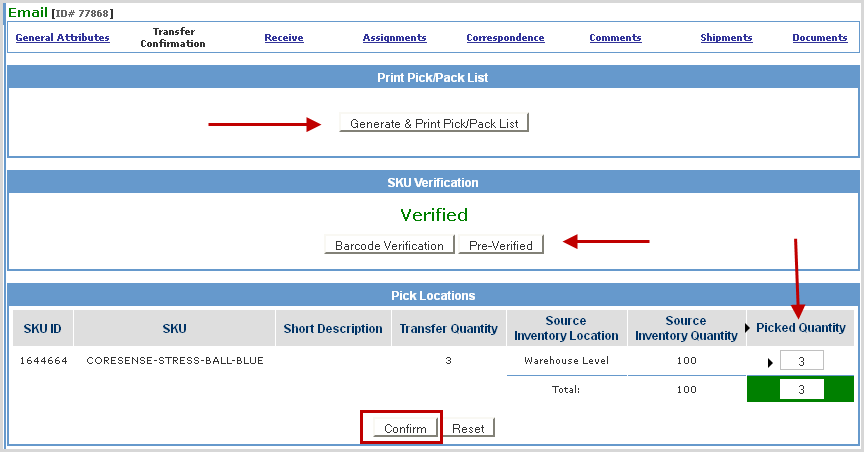
Complete the normal Transfer Confirmation steps: Generate Pick/Pack docs, Verify SKUs, enter Quantity to ship, and Confirm transfer.
|
|
5 |
Go to the Documents screen to view the two files that are generated for the transfer.
|
|
6 |
Download the "Inbound Shipment Upload File Tab Delimited" and then upload it to your Amazon Seller Central. Once uploaded, the file is stored in the Seller Central shipping queue. If you are sending inventory in cases, you can use the second file "Case Upload File". The spreadsheet includes all data except for case counts, which you can enter and then upload to Seller Central. |
|
7 |
Click on the Receive link to receive the inventory from the Back Office. |
© 2023 CORESense · info@coresense.com · 125 High Rock Avenue, Saratoga Springs, NY 12866