![]()
![]()
Website categories are identified during the implementation phase. You can update and manage your categories using the Category Navigation functionality located in the Channels manager.
Path: Back Office > Products > Channel Managers > Website > Category Navigation
From the Category Navigation you can:
Note: website categories are cached at the server level each evening to optimize page load performance. Around 04:00 EST each morning,the cache is cleared and rebuilt on the server.
If you want to see changes to categories immediately, you can flush the cache using the following URL: http://www.<clientname>.coresense.com/lib/clear_cache.php
Preview mode of the website template manager does not cache, so it is always up to date and can be used to review category changes as well as changes you may have made to your website templates.
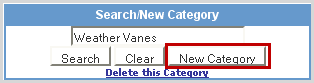
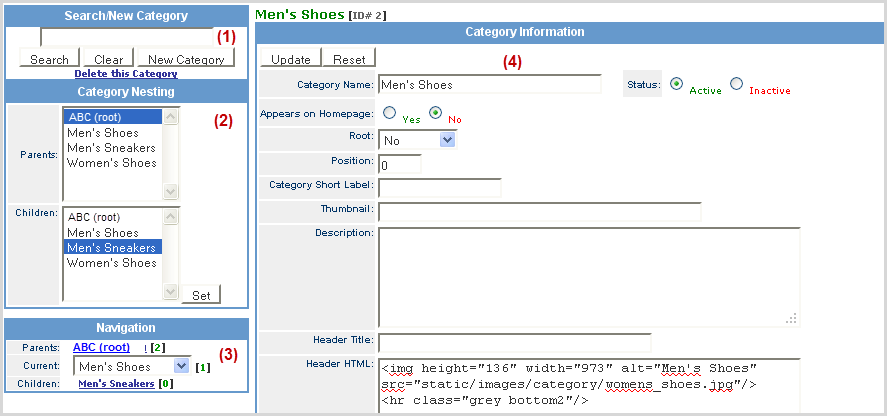
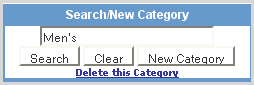
To locate an existing category to review or update, use the Search/New Category box.
|
Step |
Action |
|
1 |
Enter the category name (partial names are acceptable) into the Search/New Category field and click Search.
|
|
2 |
The results are listed in the right frame with the key search word highlighted in red.
|
|
3 |
Click on the Category Namelink that you want to review and the information screen displays. |
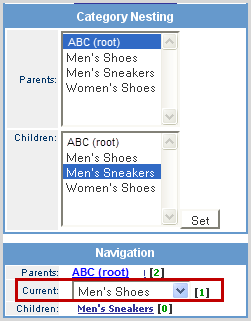
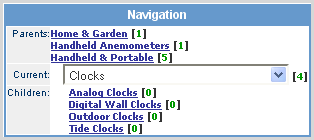
When a category is selected, its parent and child relationships display in the Category Nesting and Navigation boxes.
|
Step |
Action |
|
1 |
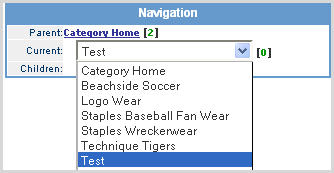
Select a category via search or select from the Current drop-down list under Navigation.
|
|
2 |
Once a Category is selected, its Parent Category is listed above it and any related Children are listed below. The parenthetical number
|
|
3 |
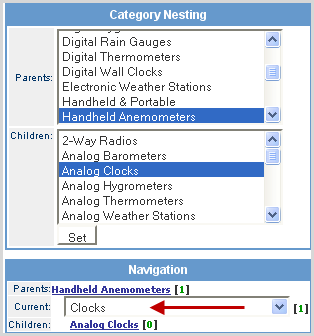
To update Parent/Child relationships, select the category from the Current drop-down list.
|
|
4 |
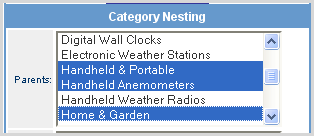
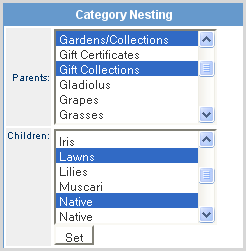
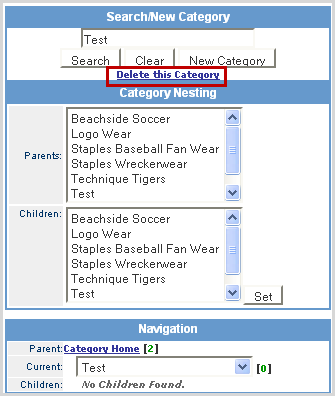
In the Parent list, click on all categories (use <Ctrl> key to select multiple options) that are to be a parent to the selected Current category.
|
|
5 |
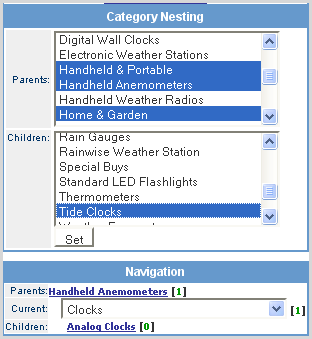
In the Children list, click on all categories (use <Ctrl> key to select multiple options) that are to be a child to the selected Current category.
|
|
6 |
Click the Set button to save the relationships. Note: Once the relationships are set, to change them, you need to reselect each category again. |
|
7 |
The new parents and children are listed above and below the selected Category.
|
New categories can be added from the Search/New Category box.
|
Step |
Action |
|
1 |
Enter a name for the new category and click the New Category button.
|
|
2 |
Enter the attributes for the new category in each box as described below.
Category Name - The category name. Status - The category status. If the status is Active, the category is displayed on the website. If the status is Inactive, the category is disabled and does not display on the website. Position - Only used for 1st level categories, this is the position of the category as it displayed in the category navigation section, located on the left-hand side of your website. Thumbnail - The category thumbnail image path. This is only required if the current category is a child of a website category. For example, a thumbnail image of the Senior/Adult category is displayed on the Aluminum Bats category page. This is because the Senior/Adult category is a child of the Aluminum Bats category. Description - Used for internal informational purposes and not displayed on your website, this is a general category description. Header Title - The category header title. This is displayed at the top of the category page, just below the main website header and just above the Header HTML, explained below. Header HTML - The category header HTML. This is displayed just below the Header Title, explained above, and can include HTML. META Information - This is used by search engines for natural search engine placement of your site, which can be very effective in increasing website traffic and subsequently sales. The following four META attributes are requested:
|
|
3 |
Set the website Parents and Children category relationships.
Note: To select or de-select categories, hold down the <Ctrl> key while clicking your left mouse button |
|
3 |
Enter the label you want to display in place of the URL path in the web browser and SOI drop-down channel selection.
|
|
4 |
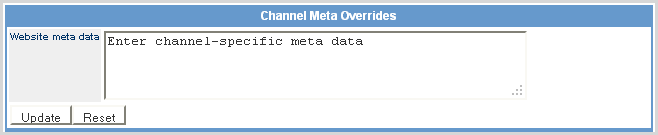
Enter channel-specific meta data that you want to override the default meta data, which includes the HTML for: META Title, META Description, and/or META KeyWords .
|
|
5 |
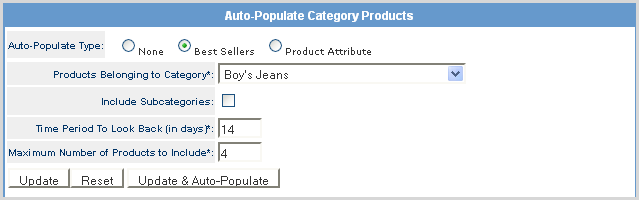
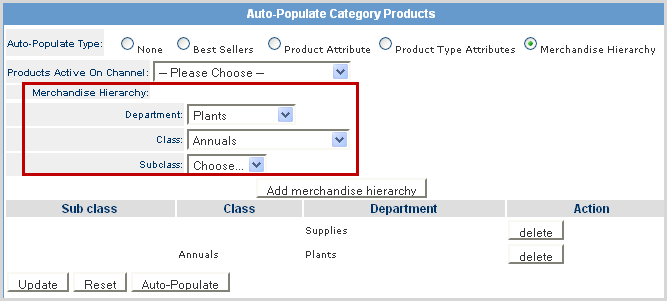
Ability to have a Category be auto-populated with products based on Best Sellers or Product Attribute.
Click on an option to view additional setup information. Best SellersAdded the ability to have a Category be auto-populated with products based on Best Sellers. Note that the order in which the products are displayed is driven by which product has sold the most. The basic setup steps include: 1. In the Category Manager Auto-Populate Category Products section, select the Best Sellers option and select from the related drop-down options: a. Products Belonging to Category – Select the category to be auto-populated. b. Include Subcategories – Check the box if you want to include subcategories. c.Time Period To Look Back – Enter the number of days you want the system to analyze bestsellers for the selected category. d.Maximum Number of Products to Include – Enter the number of products you want displayed as a best seller. e. Click the Update & Auto-Populate button.
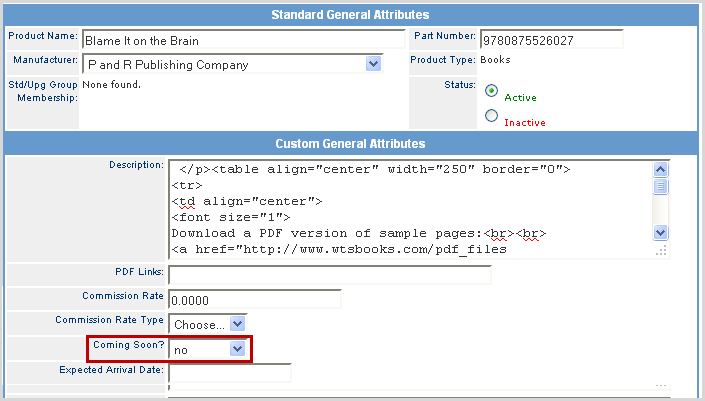
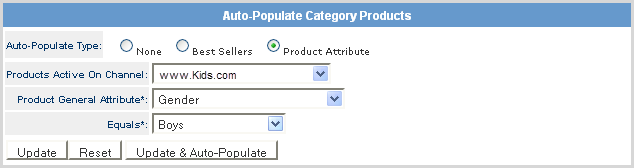
Product AttributeThe basic setup steps include: 1. Request a custom field in your Product Custom General Attributes to assign products for auto-population (i.e., Coming Soon = Yes or No).
2. Create a new category in the Category Manager that you want products with the assigned product attribute to be displayed or identify an existing category. 3. In the Category Manager Auto-Populate Category Products section, select the Product Attribute option and select from the related drop-down options: a.Products Active On Channel – Select the channel for the auto-population of the product. b.Product General Attribute – Select the Product Attribute field to map the product for auto-population to the category. c.Equals – Select the category to display the auto-populated products. d. Click the Update & Auto-Populate button.
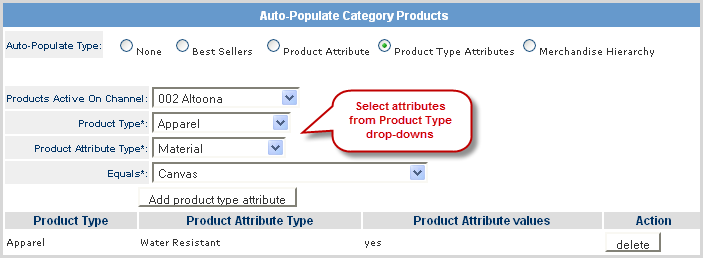
Product Type AttributesThe basic setup steps include:
Merchandise HierarchyThe basic setup steps include:
NOTE: The Auto-Populate functionality is managed by a nightly cron that reviews any criteria set within any of the auto-populate types. This means that if you enter any products manually to the category using the Add Product to Category section cited below, those products will be overwritten each time the cron runs. To view the current list of products for each Auto-Populate Type, select the type and the associated products list in the Category Products box below. |
|
6 |
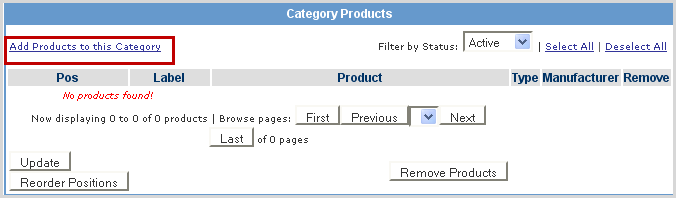
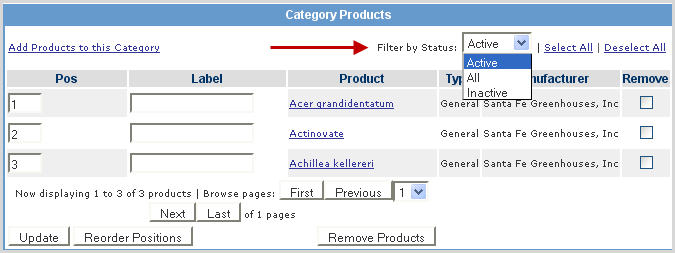
Click Add Products to this Categoryto add products to the website category.
|
|
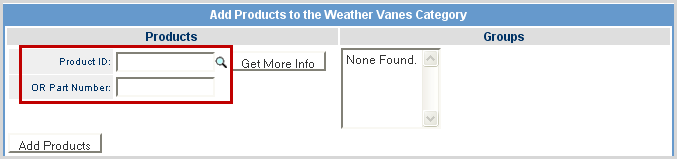
7 |
Add a single product to the category using the Product ID or Part Number. Click on the
Note: By clicking More Info, a new window appears displaying the product configuration and up-sells associated to the product matching the entered Product ID. By clicking Pricing Information from the new window, another new window appears displaying the channels section of the associated product. |
|
8 |
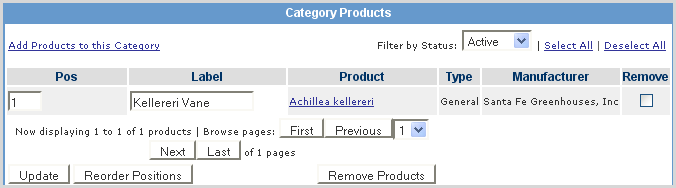
The following information is displayed for each category in the Category Products section.
|
|
9 |
Repeat the above steps to add additional products to the category. |
|
10 |
The product list can be filtered according to the status options in the drop-down list.
|
|
11 |
When all information is complete, change the status to active to have the new category display on the website.
|
Follow the steps below to remove a category from your site navigation.
|
Step |
Action |
|
1 |
Select the category to be deleted from the Current drop-down list under Navigation.
|
|
2 |
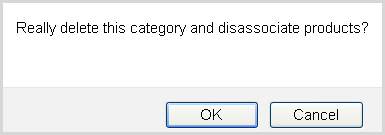
Click on the Delete this Category link in the Search/New Category box.
|
|
3 |
Click OK to continue.
|
A website category can be duplicated under Category Navigation. Use the "Duplicate Category" button to copy or clone the existing category under a new ID.
The following details are copied over to duplicate:
NOTE: URL Overrides will NOT be copied in order to avoid data conflicts. The new category is created with a default "Inactive" status.
© 2023 CORESense · info@coresense.com · 125 High Rock Avenue, Saratoga Springs, NY 12866


 next to the selected category identifies how many children are related to the category.