![]()
![]()
This section explains how to generate barcode labels using the Label Wizard within the Barcode Manager. The Barcode Manager enables you to generate labels for a single or multiple products.
|
Step |
Action |
|
1 |
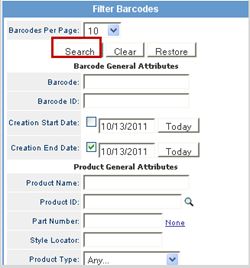
Search for the barcode(s) you want to generate labels for by entering the relevant criteria into the Filter Barcodes box and click Search.
Tip: If you anticipate a large number of results, increase the Barcodes Per Page option. |
|
2 |
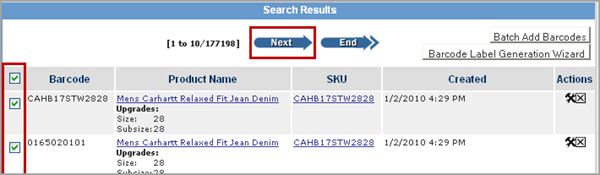
From the Search Results, select the checkboxes of the barcodes to be generated. You can check the top checkbox to select all barcodes on the screen, however, if your results include more than one page, you will need to select the top checkbox for each page by clicking the Next button.
|
|
3 |
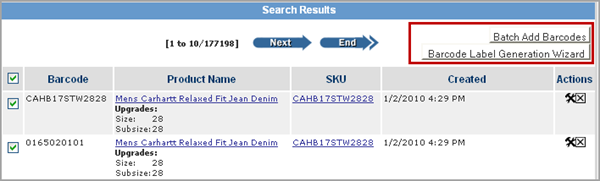
Once all barcodes have been selected, you can choose one of the following button options:
|
|
4 |
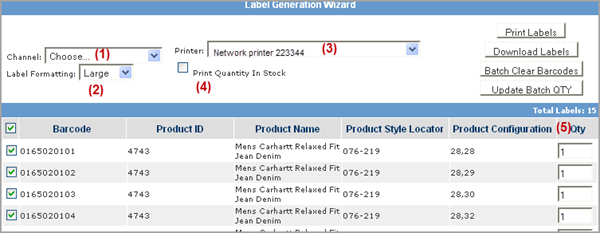
The Wizard opens so you can complete the following:
Tip: For large barcode lists that you want 2 or more printed for each, it is easier to re-run the wizard than to increase the quantity of each barcode. |
|
5 |
Click Print Labels to generate the printing run. To clear all barcodes that were added as a batch, click on the Batch Clear Barcodes button. |
© 2023 CORESense · info@coresense.com · 125 High Rock Avenue, Saratoga Springs, NY 12866