![]()
![]()
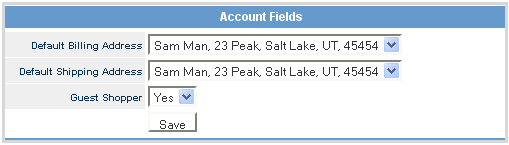
This tab stores customer details specific to credit terms and originating purchase activity. This area has several sub-sections: Account Fields, Originating Brand, Authentication, Credit Terms, Accounts Receivable, Payments, Credit Cards, Value Cards, Customer Credits, Affiliate, Customer Tiers, and In House Account.
The information displayed in this area is captured from the customer record through the web channel. A customer is categorized as a ‘Guest Shopper’ if no username and password are linked to the account information that a customer provides during an order check-out process. The only information stored by the system, for a guest shopper, is an email address.
A customer record is connected to an Originating Brand. This brand is based on the sales channel the order was placed from. Based on user permissions, it is possible to limit the customer records a user can view in the Customer Manager.

Customer account passwords are not stored in the system. Customer service personnel have the ability to reset a forgotten password from this area. From the drop-down list, choose the reason for the reset and then click Reset Password and Send Email. The system automatically sends an email to the customer containing a randomly generated password and any other instructions or information, as set-up by the client. Typically, password resets are handled from the website using the Forgot Password? link.

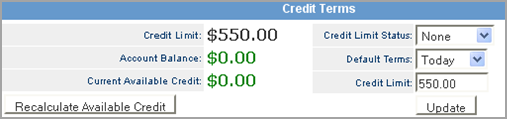
If terms are offered to a customer for purchases, the parameters of the terms are set up from this area.
|
Step |
Action |
|
1 |
Enter the amount of credit being extended to the customer in the Credit Limit box. In this example, $550.00 is the credit limit.
|
|
2 |
From the Credit Limit Status drop-down list, select the appropriate category. If Pending is selected, the Credit Limit amount changes from zero, but the customer is not able to make a purchase on terms until the status is changed to Approved. |
|
3 |
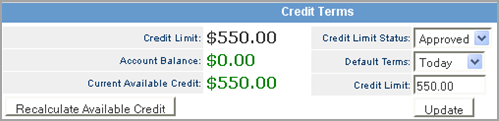
From the Default Terms drop-down list, select the appropriate length of time. If nothing is selected, the terms default to Today. Terms can be changed at anytime, even at the point of purchase. |
|
4 |
Click Update to set up the terms. |
|
5 |
The Credit Limit and Current Available Credit should change from $0.00 to the credit limit amount entered ($550.00).
|
Any orders with a due balance for a customer displays in the Accounts Receivable section, whether there are terms set up for this customer or not.
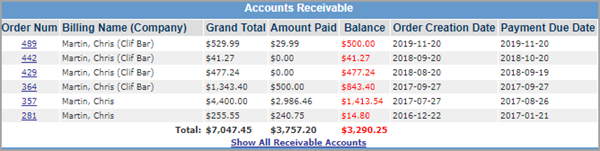
A payment can be applied to outstanding receivables from this area. If a payment has been posted to the customer account, use the Start and End date fields to search for payment. These dates can be adjusted.

Follow the steps below to apply an account payment.
|
Step |
Action |
|
1 |
Click on the Apply Account Payment button. |
|
2 |
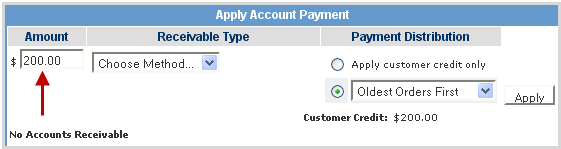
In the Apply Account Payment window, enter the amount being collected in the Amount field.
|
|
3 |
Choose the payment method from the Receivable Type drop-down list and enter any related information such as check # or credit card data.
|
|
4 |
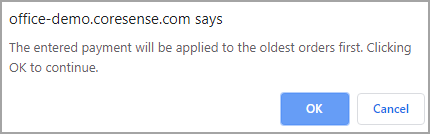
Use the radio buttons to select the how the payment should be applied. For example, apply the payment to the Oldest Order, Newest Order, Highest balance, Lowest Balance or Manually Distribute the payment amongst the order you select. |
|
5 |
Click Apply to submit. The payment displays in the payments section. The system will ask to verify payment.
|
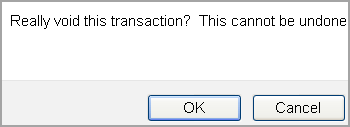
Performing a void is the only action you can take against a payment transaction. Follow the steps below to void an account payment.
|
Step |
Action |
|
1 |
From the Payments section, click on the Void link.
|
|
2 |
The system prompts you to confirm the void. Click OK.
|
|
3 |
The status of the payment is now listed as Void.
|
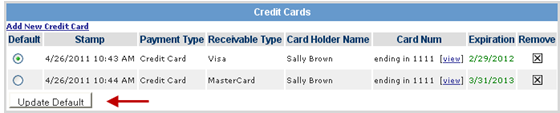
Any credit card a customer has used as a form of payment displays in the credit card section. The credit cards listed here are available as a form of payment from the back office when posting a payment to an order or customer account.

Important: This list of credit cards is not available to customers to select from when placing an order on the website. Customers must enter credit card information each time they order.
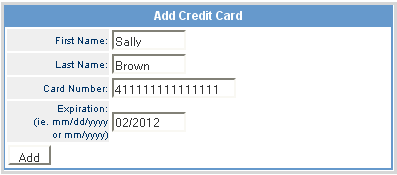
A Credit Card associated with this account can also be manually added to this area by customer service personnel. Follow the steps below to add a credit card to an account.
|
Step |
Action |
|
1 |
Click on the Add New Credit Card link. |
|
2 |
Enter the card information and click on Add to save.
|
|
3 |
All the credit cards that have been added to this account display. The default card can be reset selecting the appropriate radio dial and clicking Update Default.
|
|
4 |
To remove a credit card from the customer’s account, click the |
|
5 |
The system prompts you to confirm the deletion. Click OK. |
Value Card (a.k.a. gift card) information that is associated with this customer is located here. Cards can be edited (made inactive) or deleted from this section. Click on the  icon of the card to deactivate it.

Important: Value cards cannot be created or initiated from this area. Value cards are generated under the Value Card Manager.
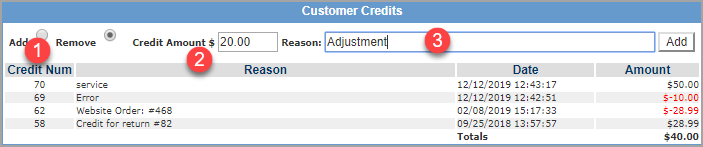
Any credit associated with this account display in this area. A customer credit is like a merchandise credit. Once applied, the credit remains with the customer account.

Follow the steps below to add a customer credit manually from the Account section.

|
Step |
Action |
|
1 |
Select the Add radio dial option. |
|
2 |
Enter the amount to be credited to the customer. |
|
3 |
Enter a Reason and click Add. |
Follow the steps below to subtract an amount from a customer credit.
|
Step |
Action |
|
1 |
Select the Remove radio dial option. |
|
2 |
Enter the amount to be removed from account. |
|
3 |
Enter a Reason and click Add. |
The Affiliate area only contains information if the Affiliate Manager is active. Contact your CORESense Customer Support Representative for more information about this section.

Customer Tiers is used for advanced pricing strategies. It attaches the customer record to a certain level of discount based on their volume or purchasing. See Pricing Tiers for more information.

In House Accounts are set up through the In House Account Manager. Refer to this documentation review the steps needed to associate a customer to an IHA.

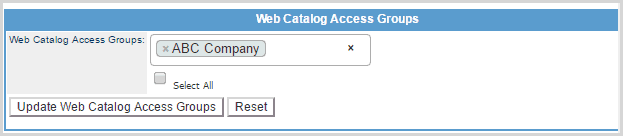
This is used to limit a customer account to specific website category pages. See the Web Catalog Access Control Manager instructions for setup.
© 2023 CORESense · info@coresense.com · 125 High Rock Avenue, Saratoga Springs, NY 12866