![]()
![]()
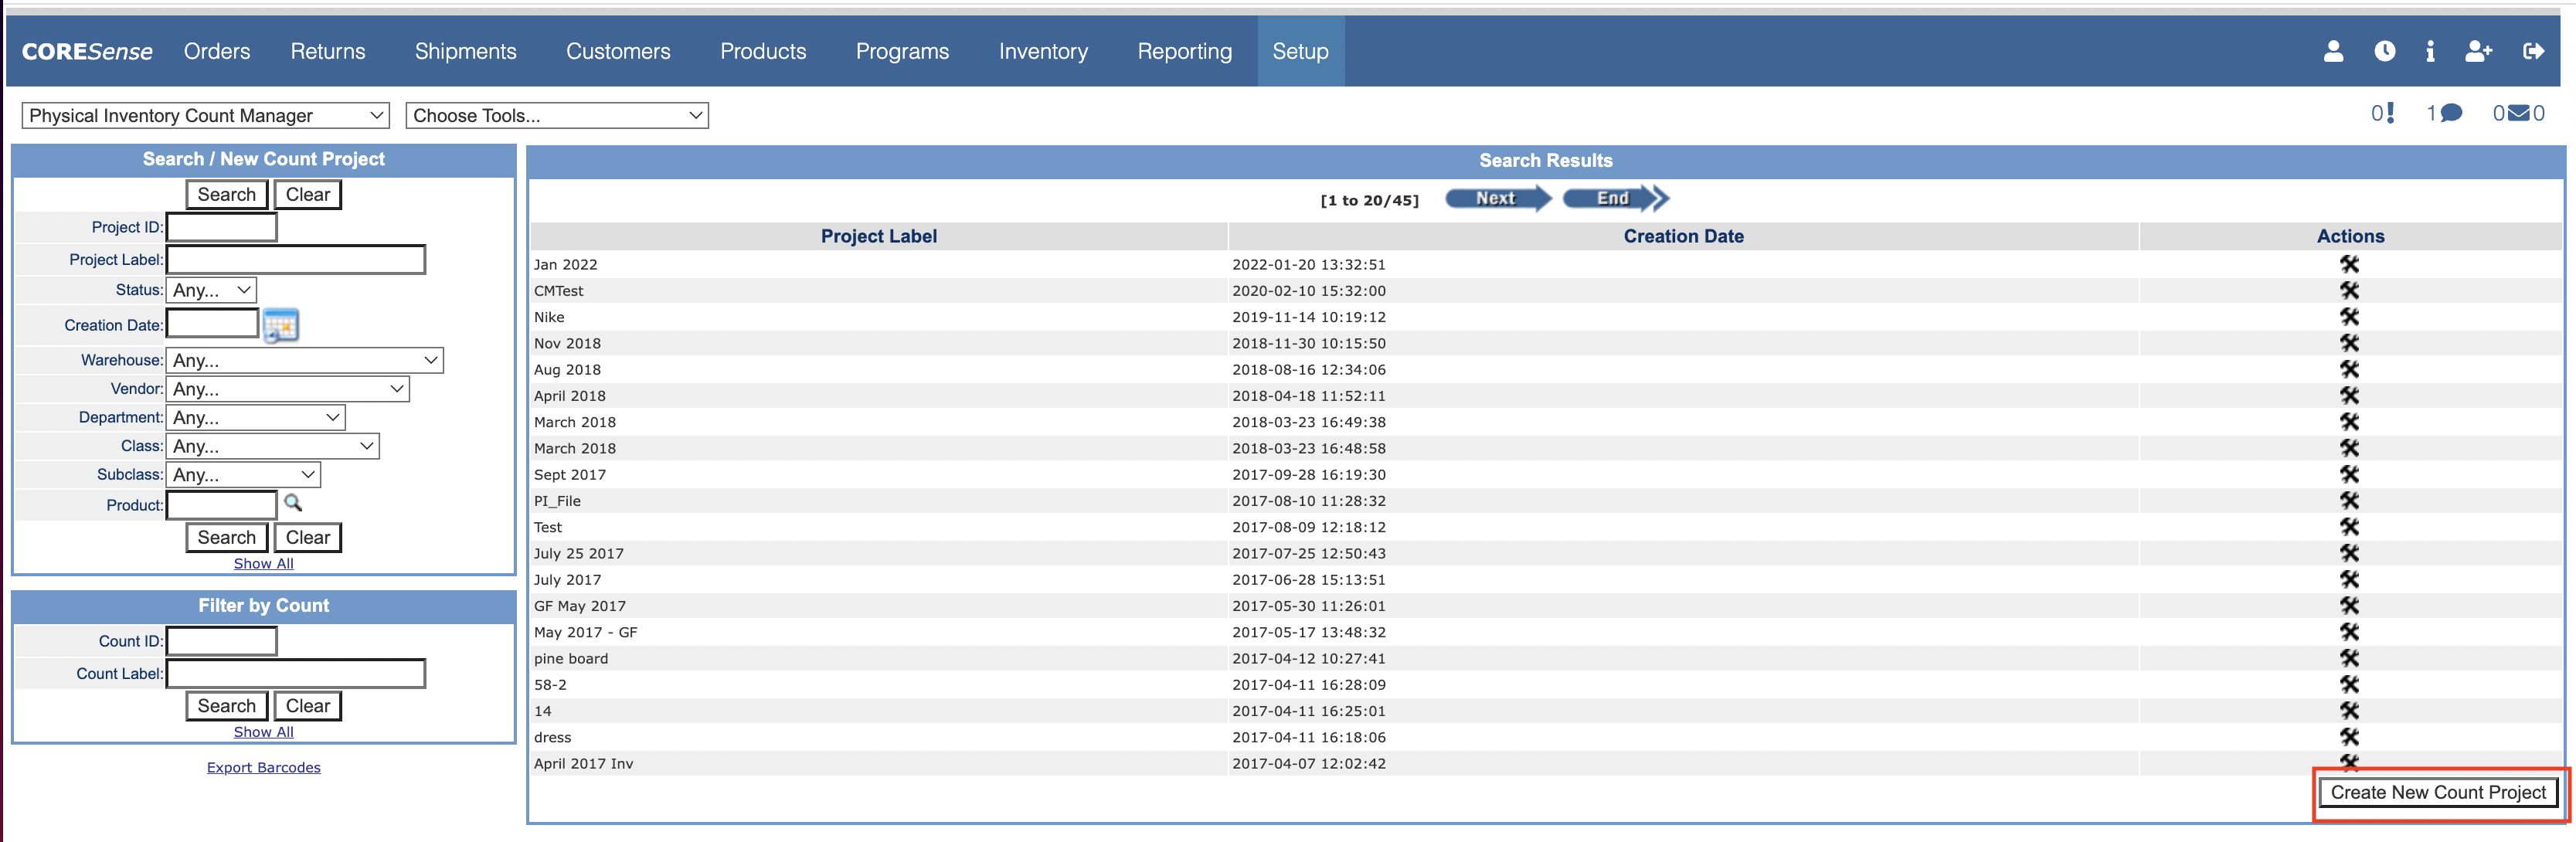
Physical inventory counts are based on SKUs that have transaction activity. Based on transaction history, this tool identifies the current inventory level per SKU, providing a snapshot of inventory based on date and time of project count creation.
Physical Inventory is organized within a project per an individual warehouse that can then be filtered against sub-location, merchandise hierarchy and/or Product ID criteria. A project can have multiple counts and can be conducted either manually or using a barcode scanner. Using the barcode scanner method requires that you have a scanner system that can import the CSV spreadsheet.
Follow the steps below to create a Physical Inventory Count project in which the count is conducted manually instead using a barcode scanner.
|
Step |
Action |
|
1 |
Click on the Create New Count Project to begin a new inventory count.
|
|
2 |
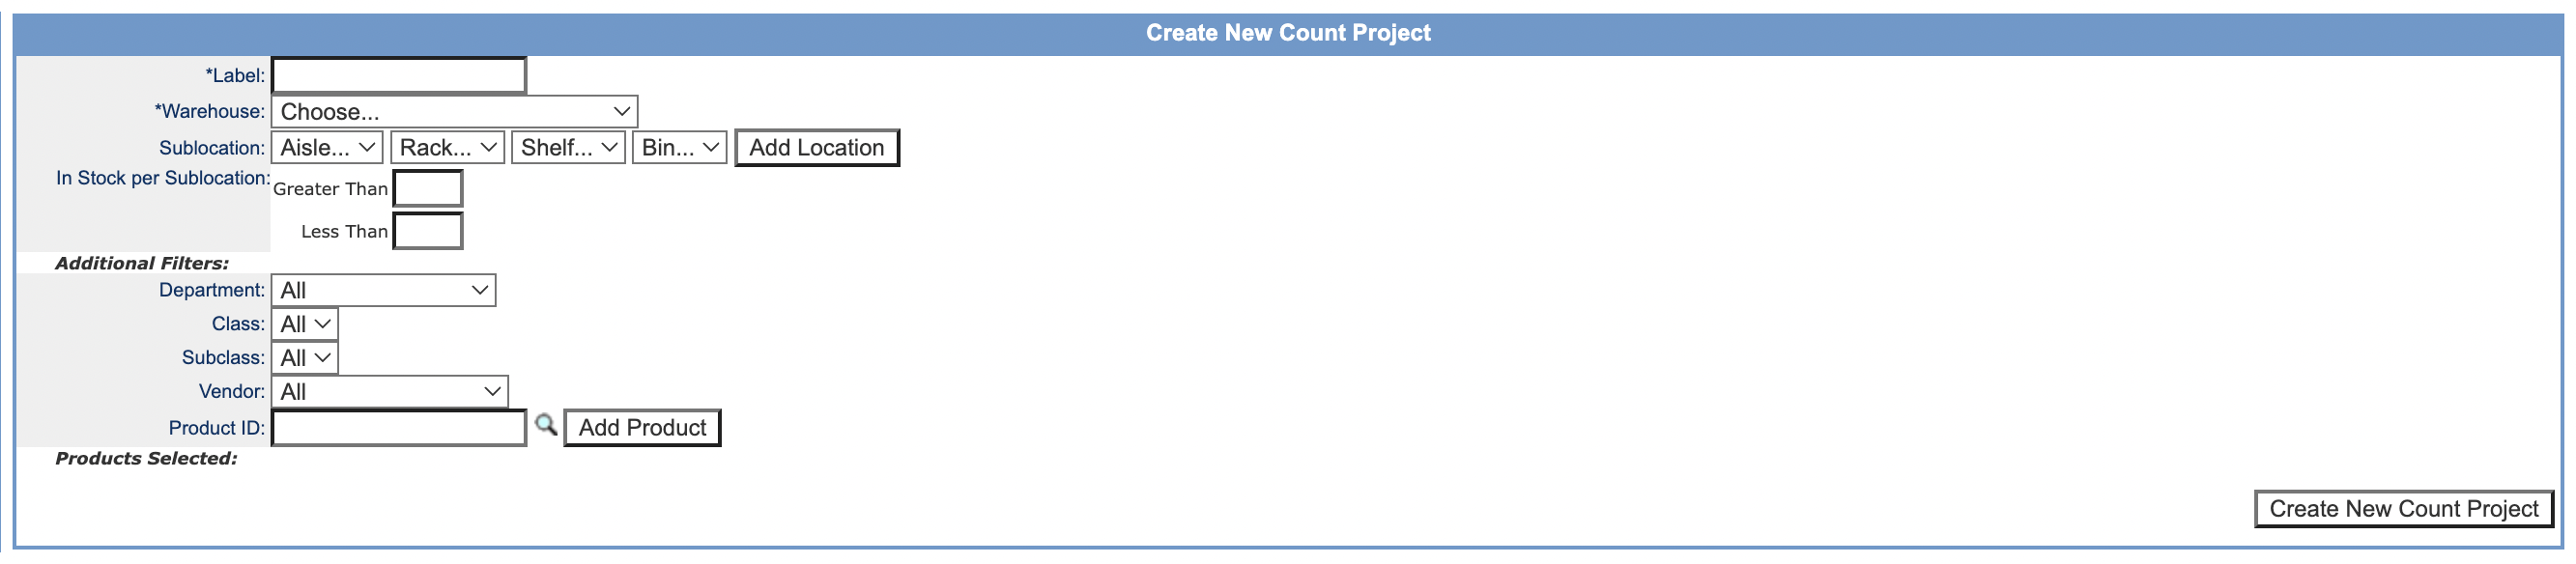
Enter and/or select the appropriate parameters for the count project as described below.
Label - Enter a descriptive name for the project. Location - Select the warehouse/location that is being counted. Only one warehouse can be counted within a single project. Sublocation - Select a sub-location that is being counted as appropriate. In Stock per Sublocation: Enter Greater Than and/or Less Than stock quantity amounts. Department, Class and Subclass - Identify product types are being counted if you are managing the count according to that group. Vendor - Identify a vendor if managing the count according to different vendors. Product ID - Use the |
|
3 |
Click the Create New Count Project button. |
|
4 |
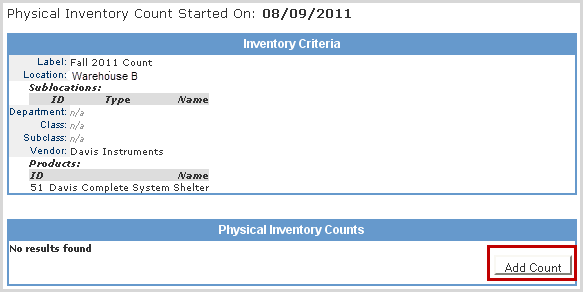
Click the Add Count button to select counting method.
|
|
5 |
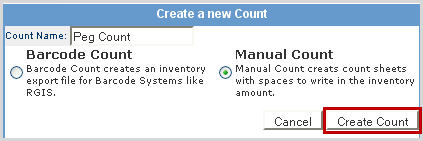
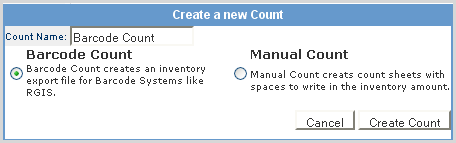
Count Name. Click the Create Count button to begin.
NOTE: There is a system setting which resides in the Products / Labels > Labels section and is labeled Physical Inventory Count Sheet Ordering that allows you to choose to have your manual Physical Inventory count sheets sorted by either Merchandise Hierarchy or Sub-Location.
|
|
6 |
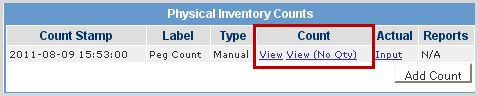
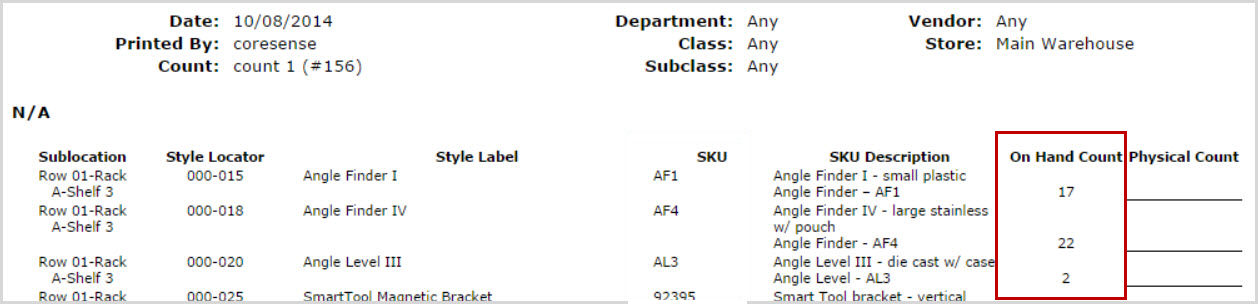
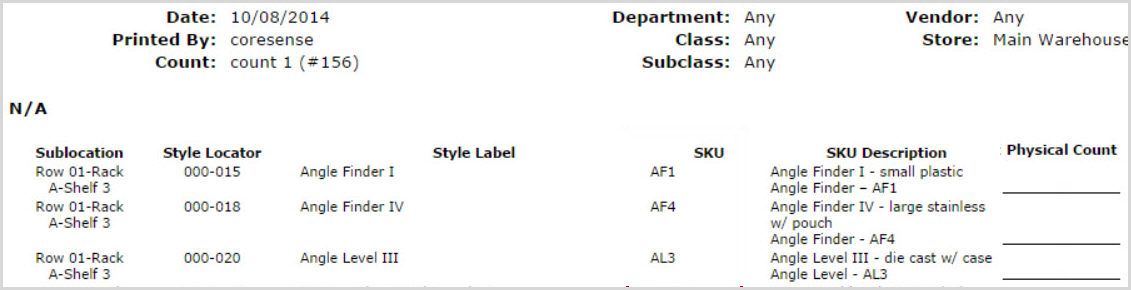
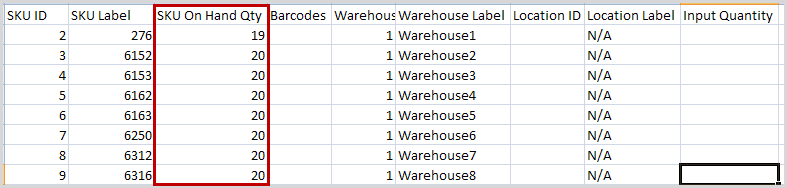
Select whether to conduct the count with the on hand quantities list or not listed. Click on the links below to view samples of each option.
View = quantities are listed
View (No Qty) = quantities are not listed
Note: The On Hand Count value = Stock + Reserved + Assigned SKUs that are in shipment status of "New". It doesn't include assigned SKUs that are in shipments with status = Picking, Packing. |
|
7 |
Print out the sheet and perform the physical count. |
|
8 |
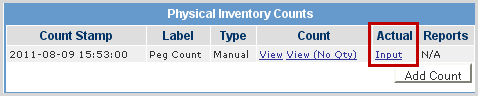
Click on the Input link to enter the count quantities into the project. Multiple counts can be used and only those SKUs with quantities entered for each count Input are updated once the Variance Report is accepted.
Note: You cannot delete a project count Input. If you have multiple counts and are concerned the wrong Input is submitted, that needs to be managed by who has access. |
|
9 |
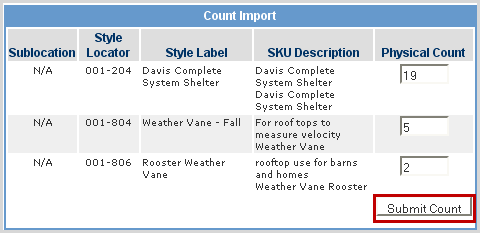
For each SKU, enter the quantity and then click the Submit Count button.
|
|
10 |
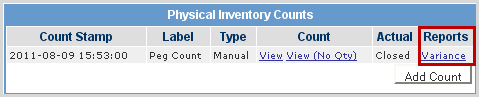
Click on the Variance link to review the count results.
Note: The Actual status is now Closed so the count findings cannot be altered. Click the Add Count button to conduct another count. |
|
11 |
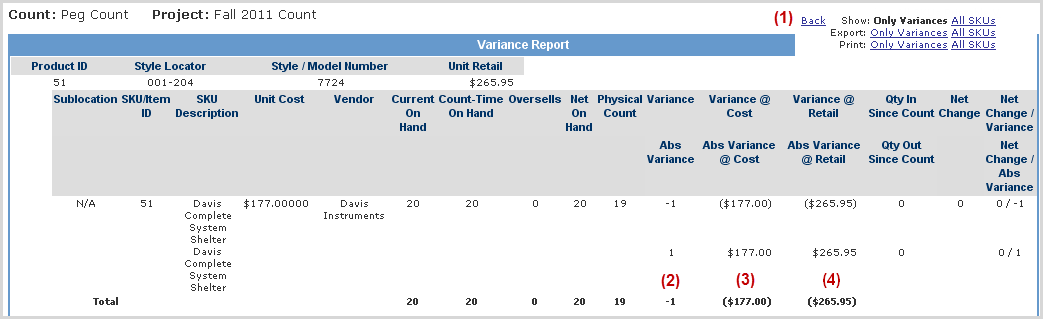
The report lists the following information for each Product ID and provides exporting options. (See Variance Report content for report definitions.)
NOTE: The Oversells column tracks inventory that has been assigned a reason code of either POS Oversale and Create Inventory for Transfer. |
|
12 |
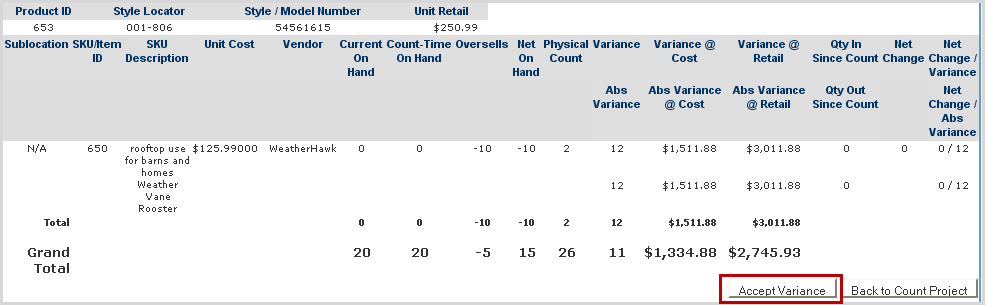
At the bottom of the report, click the Accept Variance button to finish the count or click the Back to Count Project to return to the Count screen and conduct another count.
Note: Once one of the counts variance reports has been accepted all other variance reports are locked. You can open those other variance reports but the Accept Variance button is non-functional. |
|
13 |
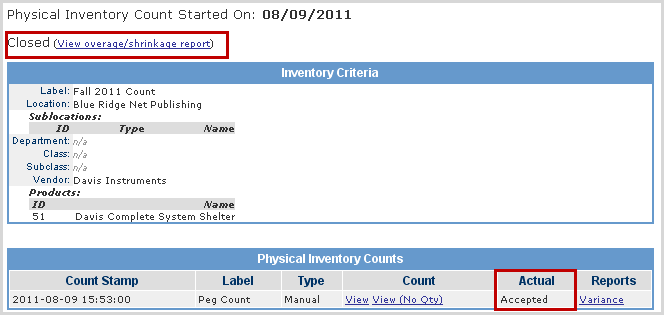
The project is Closed and the Actual status is now Accepted. Click on the View overage/shrinkage report to reference the count findings.
|
Follow the steps below to create a Physical Inventory Count project in which the count is conducted using a barcode scanner. The recommended model for barcoding from Barcodesinc is Cipherlab 8600, see installation instructions below.
This is the model information and contact that we use for barcoding from Barcodesinc. Model: A86BSL8N211V1 CIPHERLAB, BATCH AMERICA EXCLUSIVE, LASER, 8MB, 29 KEYS, 1100MAH, ADAPTER WITH US(TW,JP) PLUG, SNAP-ON FAST VPORT CABLE - Its from Barcodesinc - cschroeder@barcodesinc.com is contact. Need to specify that the purchase is for CORESense when contacting sales rep.
|
Step |
Action |
|
1 |
Click on the Create New Count Project to begin a new inventory count.
|
|
2 |
Enter and/or select the appropriate parameters for the count project as described below.
Label - Enter a descriptive name for the project. Location - Select the warehouse/location that is being counted. Only one warehouse can be counted within a single project. Sublocation - Select a sublocation that is being counted as appropriate. In Stock per Sublocation: Enter Greater Than and/or Less Than stock quantity amounts. Department, Class and Subclass - Identify product types are being counted if you are managing the count according to that group. Vendor - Identify a vendor if managing the count according to different vendors. Product ID - Use the |
|
3 |
Click the Create New Count Project button. |
|
4 |
Click the Add Count button to select counting method.
|
|
5 |
Select the Barcode count method and click the Create Count button to begin.
|
|
6 |
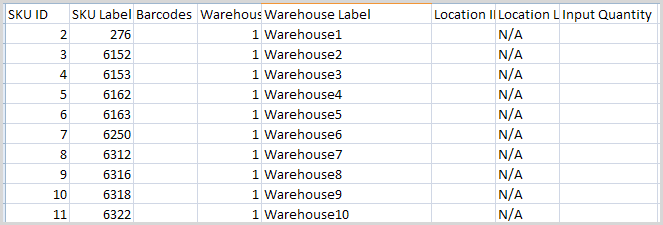
Select whether to conduct the count with the on hand quantities list or not listed. Click on the links below to view samples of each option.
Export = quantities are listed
Export (No Qty) = quantities are not listed
Note: The On Hand Count value = Stock + Reserved + Assigned SKUs that are in shipment status of "New". It doesn't include assigned SKUs that are in shipments with status = Picking, Packing. |
|
7 |
Save the spreadsheet in Excel format to your local computer and import it into your barcode scanner system to perform the physical count. |
|
8 |
Once your scanning is complete, click on the Import link to enter the count quantities into the project. The line items can be sorted within the spreadsheet but the column headers need to be in the original order for the import to read correctly. Multiple counts can be used and only those SKUs with quantities entered for each count Import are updated once the Variance Report is accepted.
Note: You cannot delete a project count Import. If you have multiple counts and are concerned the wrong Import is submitted, that needs to be managed by who has access. |
|
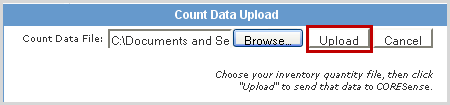
9 |
Browse to the saved spreadsheet with the counted quantities and click the Upload button.
|
|
10 |
Click on the Variance link to review the count results.
Note: The Actual status is now Closed so the count findings cannot be altered. Click the Add Count button to conduct another count. |
|
11 |
The report lists the following information for each Product ID and provides exporting options.
|
|
12 |
At the bottom of the report, click the Accept Variance button to finish the count or click the Back to Count Project to return to the Count screen and conduct another count.
Note: Once one of the counts variance reports has been accepted all other variance reports are locked. You can open those other variance reports but the Accept Variance button is non-functional. |
|
13 |
The project is Closed and the Actual status is now Accepted. click on the View overage/shrinkage report to reference the count findings.
|
CORESense has partnered with Barcoders, Inc to provide support barcode inventory count using the Cipherlab 8600 Barcode Scanner:
CIPHERLAB, BATCH AMERICA EXCLUSIVE, LASER, 8MB, 29 KEYS, 1100MAH, ADAPTER WITH US(TW,JP) PLUG, SNAP-ON FAST VPORT CABLE
The number for True Support is: 1-855-223-2921\
You can also send an email to: truesupport@barcodesinc.com
Our account number for reference is: 112803 and the Sales Order under which the code was developed is SO201211263.
The system requirements are a low-end PC or laptop with a minimum of Windows 7.
|
Step |
Action |
|
1 |
When you connect the 8600 to the PC using the Snap-On Vport USB cable you should see a driver installation occurring in the system tray of the Windows desktop. Once the driver is successfully installed open Windows Device Manager and expand “Ports (COM & LPT)” look for the newly installed Vport COM port and take note of the COM port number. |
|
2 |
Download the Forge utilities from the link below: |
|
3 |
Extract Forge Batch 8 Series Install_2010003.zip |
|
4 |
Run Forge Batch 8 Series Install_2010003.exe |
|
5 |
Follow the prompts to install the Cipherlab utility software. Once installed you will find the utilities in the Start Menu under Cipherlab>Forge>Batch. You will also be able to access the user guide from the Start Menu. |
|
6 |
Instructions for downloading the collected data from the device are in the attached PDF. |
|
7 |
Linl to the coresense.AGX file |
© 2023 CORESense · info@coresense.com · 125 High Rock Avenue, Saratoga Springs, NY 12866