![]()
![]()
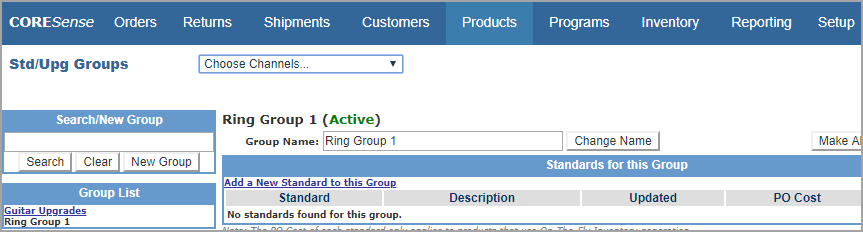
This section explains how to manage standard and upgrade groups, which enable the management of a group of configurations that apply to multiple products.
For example, a computer retailer may offer a printer upgrade for all computers manufactured by Panasonic. By using Standards and Upgrade Groups, the retailer can add the upgrade to a group that contains all Panasonic computers versus adding the upgrade to each Panasonic computer individually, which is more time consuming.
Important: Standard and Upgrade Groups are time savers for companies with products that have a high number of available product configuration options (standards and upgrades) that result in an unmanageable number of possible configurations, typically in the hundreds or thousands.
Companies selling these types of products typically set the On-The-Fly SKU generation product option, which removes the need to set up inventory requirements for each product since SKUs are created on-the-fly when sourcing order inventory .
Companies using Standard and Upgrade Groups that do not use the On-The-Fly SKU generation option (i.e. smaller, specific list of configurations) are still required to manually relate SKUs to each product configuration. For example, if the Add Printer: HP DeskJet is added as an upgrade to a group, the user is still required to manually create and relate a new SKU to each product that includes this new printer option.
This content provides steps on how to:
Path: Products > Product Std/Ugd Groups
Follow the steps below to create a new standards and upgrade product group.
|
Step |
Action |
|
1 |
From Products > Product Std/Ugd Groups, click on the New Group button.
|
|
2 |
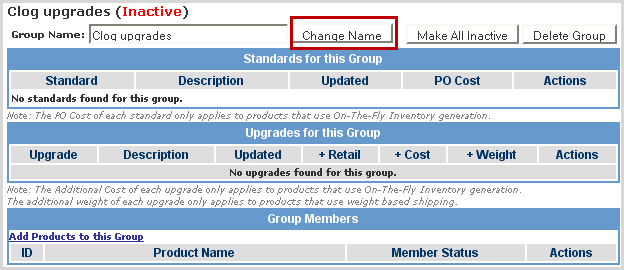
Enter a name and click on the Change Name button.
|
|
3 |
Continue with Add Product to Group. |
Follow the steps below to add product to a Group.
|
Step |
Action |
|
1 |
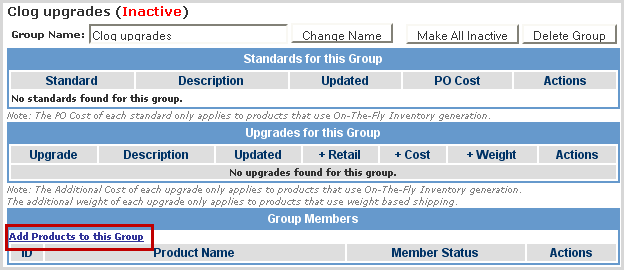
Standards cannot be assigned to the group until products have been added to the group. Click on the Add Products to this Group to access the Add Product window.
|
|
2 |
The Add Product window allows you to enter product by entering the Product ID or using the Product Picker
|
|
3 |
Click the Save button to generate the list of products. |
|
4 |
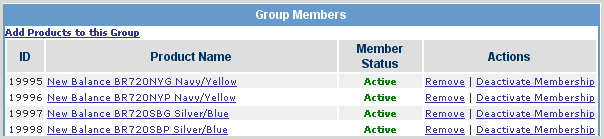
The products are now added to the group and display in the Group Members section. The following information is displayed for each product in the Group Members section:
Important: This is not the product status, rather the status of the product in the group. If the status is Inactive, the standard and upgrades in the group are not available for the product. |
|
5 |
The following actions can be performed in the Group Members box.
Important! Activating or Deactivating the product in a group, enables and disables the availability of group standards and upgrades for the product and does not update the general product status, which determines sales channel availability. If a product is deactivated from a group, the Inventory requirements for each corresponding product must be verified, and may need to be edited to remove the corresponding Standards and Upgrades. |
|
6 |
Continue with Add Standards to a Group. |
Follow the steps below to add standards to a Group.
|
Step |
Action |
|
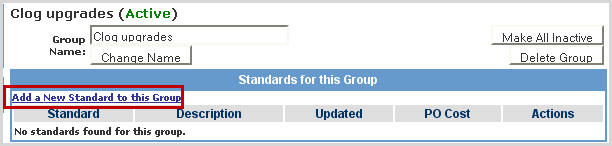
1 |
Click on the Add a New Standard to this Group link to access the standard options.
|
|
2 |
Complete the fields as described below.
Important : DO NOT select This Product Only from the Group drop-down. |
|
3 |
Click Save. The standard is now updated and available for all products in the group. |
|
4 |
Important! If the change is an error then click |
|
5 |
Continue with Add Upgrades to a Group. |
Follow the steps below to add upgrades to a Group.
|
Step |
Action |
|
1 |
Click on the Add a New Upgrade to this Group link to access the upgrade options.
|
|
2 |
Complete the fields as described below.
DO NOT select This Product Only from the Group drop-down. |
|
3 |
Click Save. The upgrade is now updated and available for all products in the group. |
|
4 |
Important! If the change is an error then click
|
Follow the steps below to search for a Group.
|
Step |
Action |
|
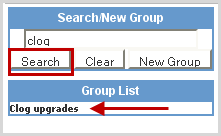
1 |
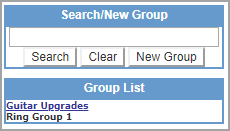
From the Search/New Group section, enter any part of the group name and click Search. If there are only a small number of groups, it may be more efficient to select the group from the Group List section, which displays all groups just below the Search/New Group section.
|
|
2 |
Click on the Product Name from the results list.
|
Follow the steps below to update or delete a Group.
|
Step |
Action |
|
1 |
Search for the desired group and select it from the results list. |
|
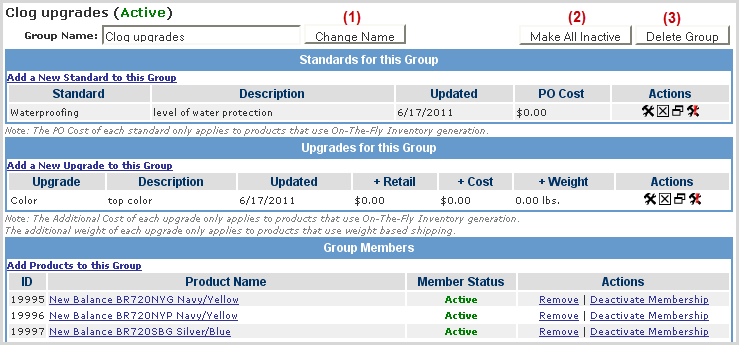
2 |
The numbered action buttons are described below.
Important: By deleting a standard and upgrade group, all associated standards and upgrades are removed from all products in the group. Once deleted, make sure to remove the SKU relationships for all products in the group. |
|
3 |
To make edits or deletions for the Standards and Upgrade sections, use the icons under the Action column.
Important: If the product being removed from the Group had any product configurations that were purchased, do not click |
|
4 |
Click the |
|
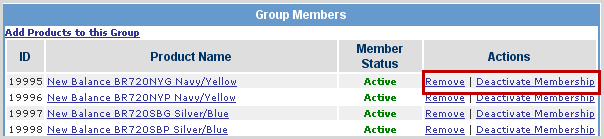
5 |
To delete a product from a Group, in the Group Members box, click on the Remove link next to the product to be deleted. To deactivate a member, click on the Deactivate Membership link of that product. Important : Deactivating the product in a group, disables the availability of group standards and upgrades for the product and does not update the general product status, which determines sales channel availability. If a product is deactivated from a group, the Inventory requirements for each corresponding product must be verified, and may need to be edited to remove the corresponding Standards and Upgrades. |
© 2023 CORESense · info@coresense.com · 125 High Rock Avenue, Saratoga Springs, NY 12866