![]()
![]()
The Report Center contains informational data. You can review information using the CORESense standard reports provided or build your own custom reports that can be saved for future use. The list of available Standard Reports can be viewed here.
The Report Center is available under Reporting, and is used to manage all standard operational reports. The primary tasks available in the Report Center include:

1) The way the report center works is that the maximum number of reports that can run at the same time is 5 - this is across all users.
2) Then within those 5 reports, it is limited to 1 report running at a time per user. If no other users are running reports and 1 user runs multiple reports at once it still only runs 1 report for that user at a time.
3) This per user limit is in place so one user does not monopolize all slots if they submitted a long list of reports before other users. This ensures that other users would not need to wait until all of the first user's reports were finished.
4) CORESense can change this setting so that each user can have a set number of reports running at the same time, up to 5 (this can not be done on a user by user basis). In this case if you set it to 5, and that user submits 25 reports and then another user submits one that users report would be added to the bottom of the queue and they would need to wait until the first users reports finishes before theirs is started.
5) There is a maximum date range of two years when using the Report Center when running a report.
Report Center Step 1
Select a report from the drop-down list to select your report criteria.

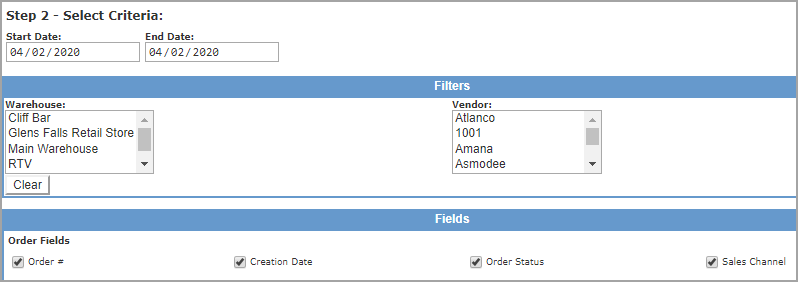
Select and/or enter the desired criteria for the report.

You can opt to include an email address so that the recipient is notified when the report is completed. Click on the Start Report button to submit the report to the Report Submissions queue.

The Report Submissions queue provides the following views and functions as described in the table below.

|
Number |
Column |
Description |
|
1 |
Lock/Public |
Lock = prevents the report from being deleted from the Report queue. Public = When checked, the URL for the report that is created in "View" mode can be shared with others that do not have reporting permissions or do not have access to CORESense.
|
|
2 |
Report Name |
This the name of the report you selected from the drop-down list in Step 1. If you saved the report with a custom name, that name will be displayed within parenthesis. |
|
3 |
Date Range/ Requested |
The Date Range represents the dates you selected as criteria for the report. The Requested column represents the date and time stamp of when the report was initiated. |
|
4 |
User |
Name of the individual who ran the report. |
|
5 |
State |
The current status of the report, which can be any of the following. New = just submitted Running = currently being generated by system Complete = ready to view or export |
|
6 |
Actions |
The following action can be taken as available based on the status of the report. Refresh Status = click to refresh a New report to see if it has moved in to Processing or Completed status. Note: Click Refresh Status doesn't quicken the processing. Once a report is completed, a yellow pop-up display at the top of the Report Center screen. View = Review the report on screen. Export = Export the report to an CSV file (Note: not all reports have export as an option.) Delete = Remove a report from the Report Submissions queue. (Reports deleted automatically after 7 days. Users can only delete their own reports.) Show Criteria = Opens up the report's criteria options with the original criteria selected so that you can view selected options and/or make changes as needed. |
|
7 |
Show reports toggle |
This link allows you to toggle between viewing only your submitted reports or the submitted reports of all users. |
Saved reports can be accessed in the following locations:

Reports in the Saved Report Manager are listed alphabetically. The launch process is:

© 2023 CORESense · info@coresense.com · 125 High Rock Avenue, Saratoga Springs, NY 12866