![]()
![]()
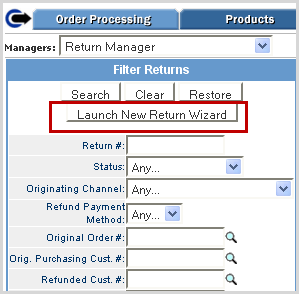
The Return Manager allows users to manage all returns in one location without having to search through customer orders. It also includes the Return Wizard so you can process returns completely or save as an open return and generate an RMA for returned items. The Return Manager screen is where you can search for specific return numbers and view general statistics on current return activity. This screen allows you to complete the following tasks.
Path:Returns > Return Manager

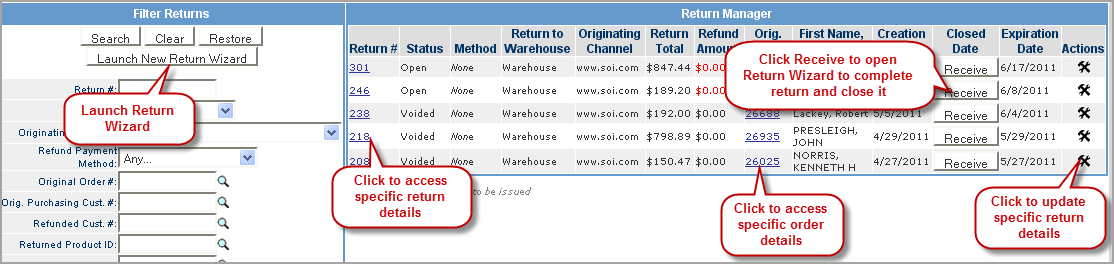
The new Return Wizard is accessible from the Return Manager.
Click on the button and the wizard prompts you to enter or search for an order to be returned. See the complete Return Wizard steps to process a return or save it as an open return.
Follow the steps below to receive returned items and close a return.
|
Step |
Action |
|
1 |
In the Return Manager search fields, enter the needed criteria to locate the return to be closed. |
|
2 |
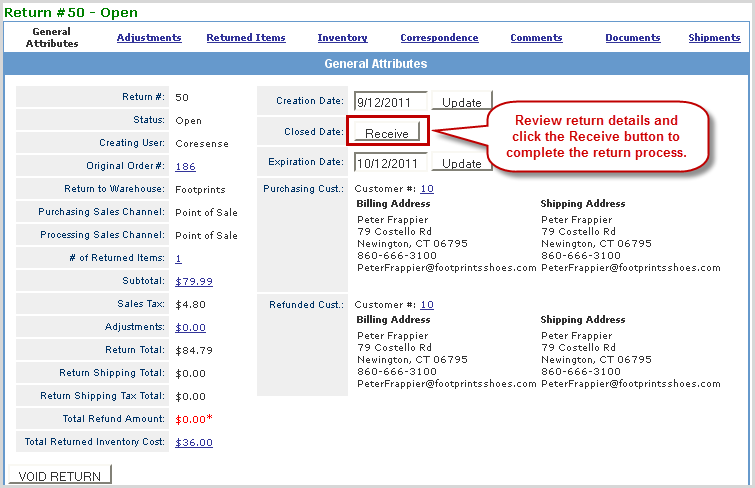
Click on the Receive button of the return in the results list to access the open return wizard. Returns that need to be Received or Issue Refund are in a "Return Pending" status. The Return Pending status means that inventory has not yet been adjusted for the return and the return has not posted to the Z-Out report for the return creation date Inventory and reporting are based on the return's Closed date.
Note: you can also click on the Return # link to open the return detail screen. This page also has a Receive button in which to initiate the refund and close of the return. Click here to view return detail screenClick here to view return detail screen. Return Detail Screen
|
|
3 |
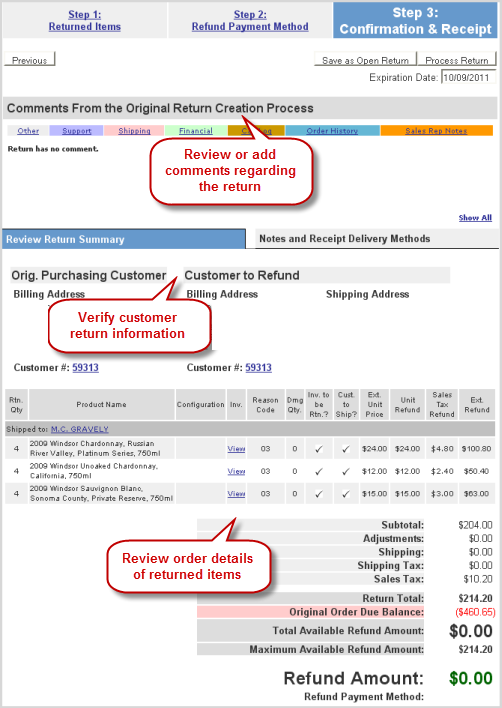
The Wizard opens in Step 3 because it is an Open Return. Review the information of each section as needed.
|
|
4 |
Click on the Process Return button to continue with the return process and close the return.
|
|
5 |
The system confirms the update in the Return Results window. Click Close Window to exit.
|
|
6 |
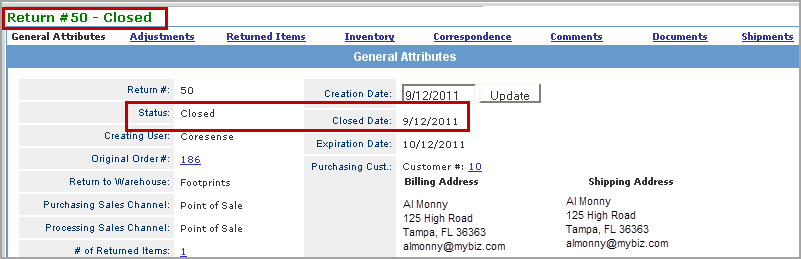
The return is now identified as closed and assigned a closed date.
NOTE: Only Open returns can be voided. Once a return has a status of "Closed" it cannot be voided. |
|
7 |
All Open Returns generate a shipment. These shipments do not require any action but can be used to store tracking and receipt information from received returned merchandise. Click on the hammer/wrench icon and enter the ship date and tracking information as desired and that will close the shipment.
|
Follow the steps below to process a return for a check or money order.
Note: This process is specific to non-Open Returns. If you are refunding with a check and choose the Open Return option, you need to first follow the Receive an Open Return steps cited above, and then issue a check upon receipt of the product per the steps listed below.
|
Step |
Action |
|
1 |
When the Check or Money Order option is selected as a refund type, an Issue Refund button displays in the Closed Date column. This button serves a reminder that the return status is not yet Closed and that your accounting team needs to issue a check for the refund.
|
|
2 |
Depending on your issuance schedule, go to the Return Manager and search on the Status of Pending Refund to list all returns that require a check or money order.
|
|
3 |
Click on the Return # ID to view details of the return and gather customer name and address information for the check issuance. |
|
4 |
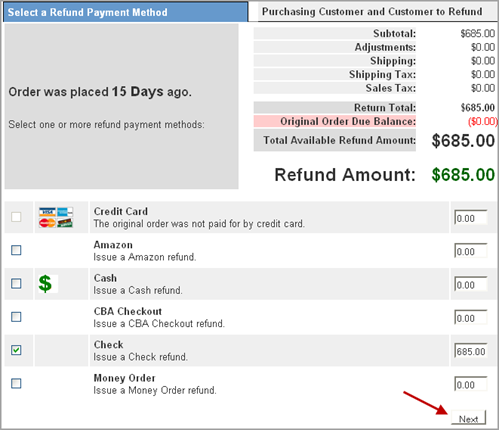
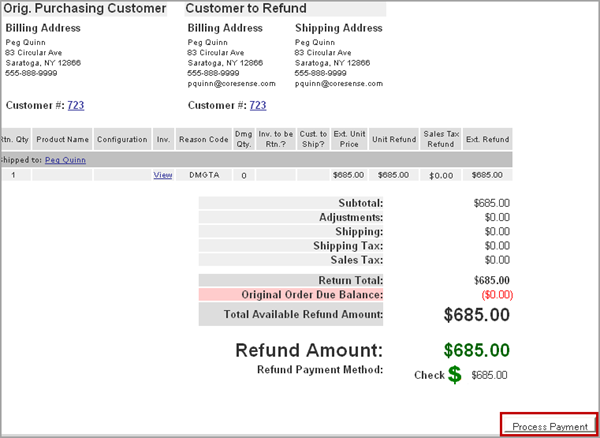
Once the check/money order has been sent to the customer, click on the Issue Refund button of the return to open the Return Wizard. Verify the refund type and Click the Next button.
|
|
5 |
Click on the Process Payment to close out the return.
|
|
6 |
The status of the return now displays as Closed within the Return Manager.
|
Using the Batch Option available in the Filter Returns search criteria, you can update the status of multiple returns in one step. Follow the steps below to perform batch actions.
|
Step |
Action |
|
1 |
In the Filter Returns section, enter the desired criteria for existing returns and check the Enable Patch Options checkbox.
|
|
2 |
Click the Search button. |
|
3 |
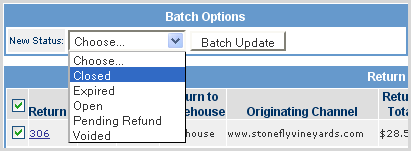
The Batch Options box displays with a drop-down list that enables you to change the status of the selected returns.
|
|
4 |
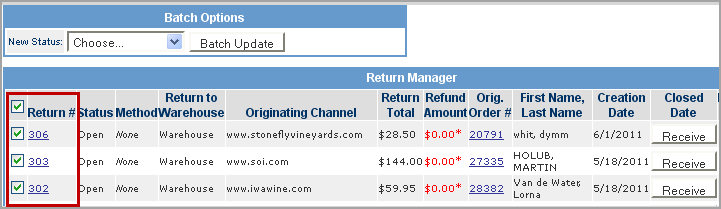
Select/deselect the individual returns to be updated using the checkboxes provided.
|
|
5 |
Select the desired status from the drop-down list and click the Batch Update button.
|
|
6 |
Based upon the returns selected, the updated returns are removed from the Return Manager results list. |
© 2023 CORESense · info@coresense.com · 125 High Rock Avenue, Saratoga Springs, NY 12866