![]()
![]()
The steps below illustrate how to process a return when launching the Four-Step Return Wizard from with the Back Office.
Follow the steps below to locate the return order for processing.
|
Step |
Action |
|
1 |
The Launch New Return Wizard button is located in the Customer Manager, Sales Order Interface (SOI), and Order Manager.
|
|
2 |
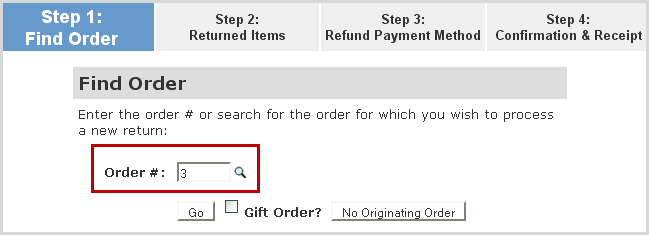
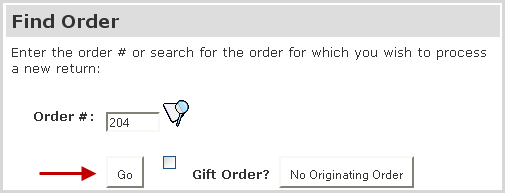
Enter the Order # if known, or click the
|
|
3 |
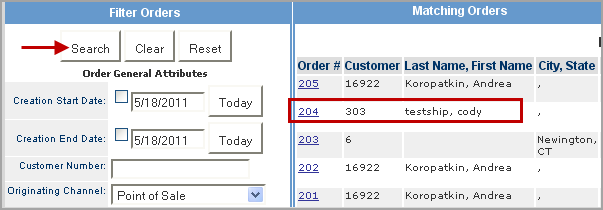
To perform the search:
|
|
4 |
If the order was a gift, check the Gift Order? option. This generates a return receipt that doesn't include any pricing. Click Go to continue processing the return.
|
Follow the steps below to enter the returned item(s) information for processing.
|
Step |
Action |
|
1 |
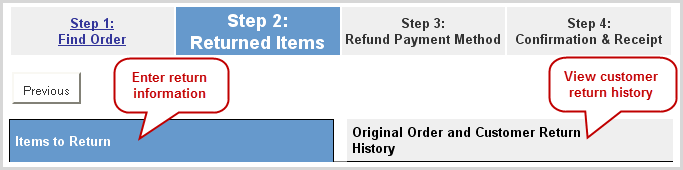
Step 2 has two tabs that provide return processing and return history.
|
|
2 |
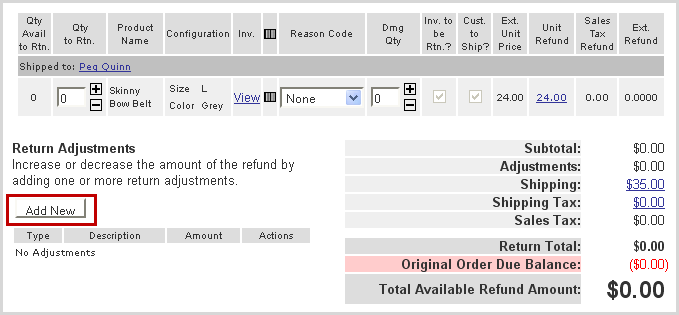
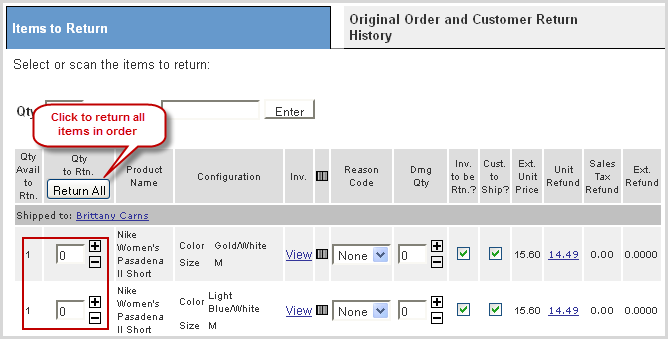
Click the (+) button to adjust the quantity being returned under the Qty to Rtn. column or if all items are being returned, click the Return All button.
|
|
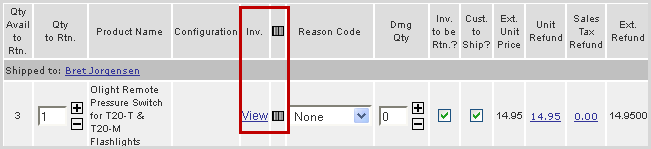
3 |
Click on the View link to check the inventory level of the item as needed. If unable to scan the barcode, click on the
|
|
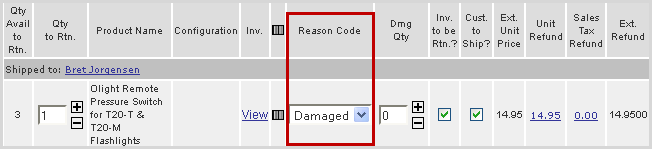
4 |
Select a reason code from the drop-down list. Note: Reason code requirements and list are setup in System Admin > Technical Configuration > Return Reason Codes table. |
|
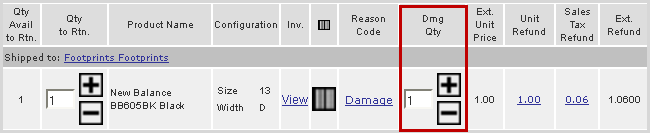
5 |
If the item being returned is damaged, click the (+) button to adjust the quantity under the Dmg Qty column. Marking the product damaged, prevents the stock inventory from being increased when the return is complete.
|
|
6 |
The two options work as follows: Inv. to be Rtn? = When checked, it identifies if the merchandise is to be sent back to the warehouse. Some industries such as plants and food,can uncheck this so no RMA is generated. Cust to Ship? = When checked, a shipment is created that is used to track the return of merchandise. If you do not want shipments created for returns, uncheck this option.
|
|
7 |
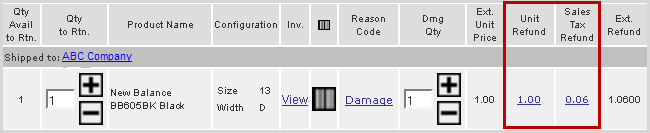
Unit Refund and Sales Tax Refund are permission based actions.
Note: These fields are pre-populated based on the original order and no changes should be made unless an override is required due to unusual circumstances. |
|
8 |
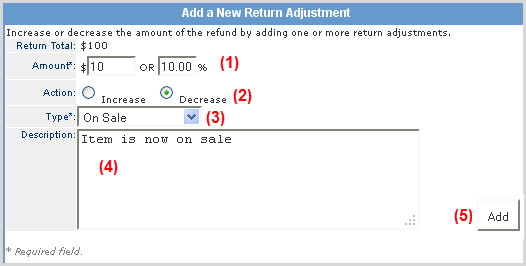
An adjustment can be made to the amount being refunded by clicking the Add New button.
Note: Adjustments are a permission-based feature and require management override privileges. |
|
9 |
Complete the form fields as detailed below:
Note: Adjustments Types are setup in System Admin > Technical Configuration > Return Adjustment Types . |
|
10 |
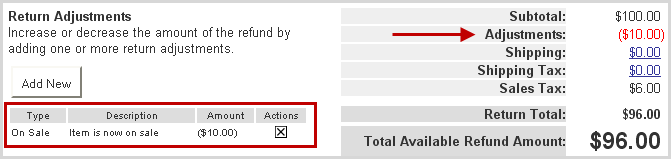
The adjustment is listed and itemized in the total summary. To remove the adjustment, click the
|
|
11 |
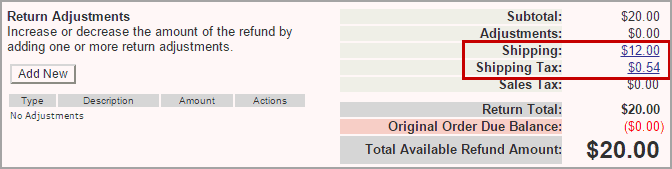
Click on the Shipping and Shipping Tax links to refund fees. Note that the Shipping and Shipping Tax lines display the amount from the original order but are not refunded unless you click on the links and enter an amount to be refunded.
|
|
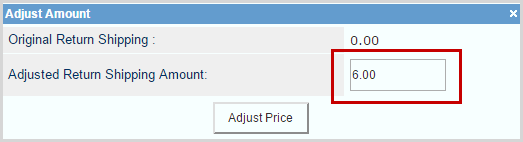
12 |
Enter the amount to refunded in the space provided (partial refunds can be applied) and click on Adjust Price.
|
|
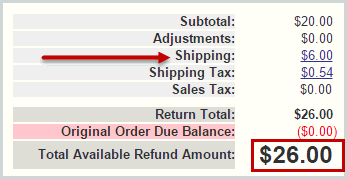
13 |
The entered amount is listed and added to the Refund Amount total.
|
|
14 |
Click the Next button. |
Follow the steps below to select the correct payment method for the return.
|
Step |
Action |
|
1 |
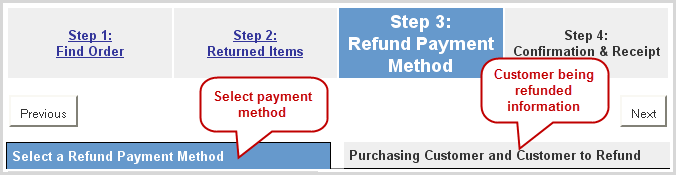
Step 3 has two tabs that provide return payment processing and capture of information for the customer being refunded. Important: If the person being refunded is not the original customer who placed the order (i.e. gift recipient), enter that person's information in the second tab. |
|
2 |
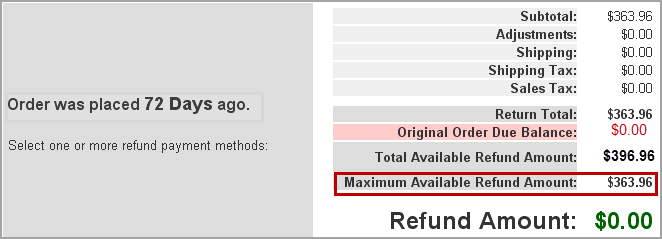
The payment method screen displays the number of days since the original purchase and itemizes all adjustments, taxes and total refund to be paid to the customer.
|
|
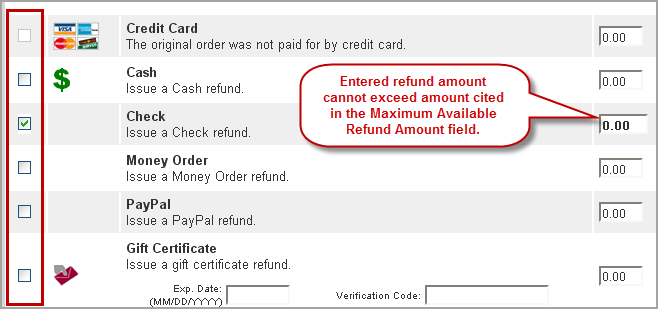
3 |
Check the box for the refund method type and enter the amount of the refund in the corresponding amount field.
Notes:
|
|
4 |
Click the Next button. |
Follow the steps below to issue a RMA or complete the return.
|
Step |
Action |
|
1 |
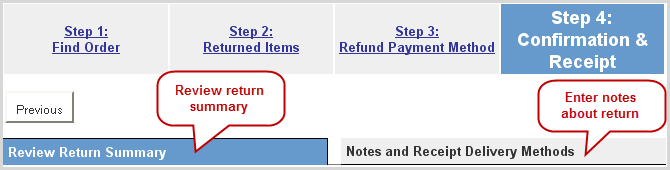
Step 4 has two tabs that provide the return summary and entry of any notes or comments regarding the return.
|
|
2 |
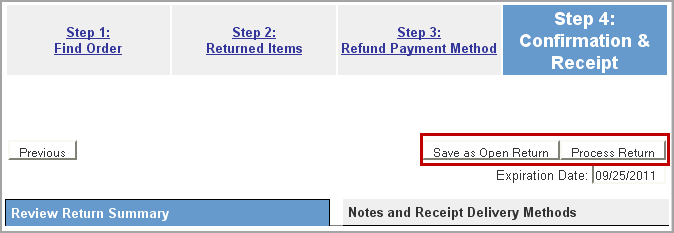
Choose to either Save as Open Return or Process Return.
|
|
3 |
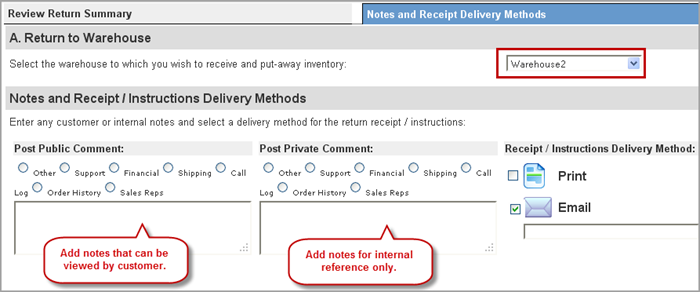
Select a warehouse and enter any comments in the fields provided.
|
|
4 |
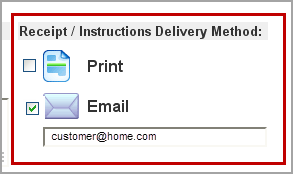
Check the box of the method you want to use to deliver the customer instructions. Enter an email address in the space provided.
|
|
5 |
Click on either Save as Open Return or Process Return. Click on Process Return to complete the return and close it. Save as Open Return issues an RMA and saves the return for closing until returned items are received. |
|
6 |
If you saved the return as an Open Return, the system assigns a Return ID to the return, which can be referenced in the Return Manager module. The system also sends the RMA Return Instructions email to the customer that contains:
|
|
7 |
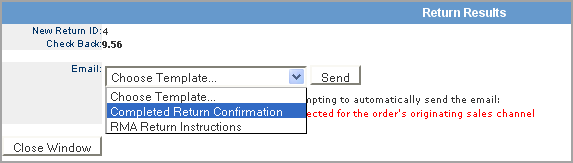
If you Process the Return, the system assigns a Return ID and prompts you to select the type of email template to be sent to the customer.
|
© 2023 CORESense · info@coresense.com · 125 High Rock Avenue, Saratoga Springs, NY 12866

 icon to identify the barcode and enter it into the Barcode field.