![]()
![]()
Follow the steps below to create a PO for needed non-grid inventory using the Purchase Order Wizard in the Inventory Manager.

|
Step |
Action |
|
1 |
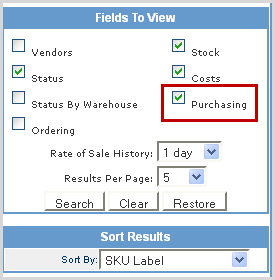
In the Fields to View section of the filter criteria, check the Purchasing option to activate the quantity fields in your SKU results list.
|
|
2 |
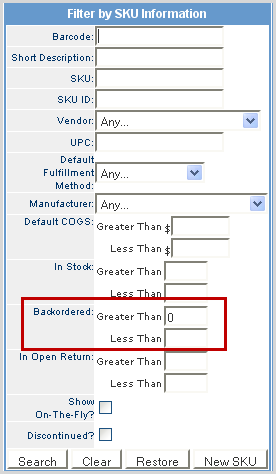
Search for SKUs requiring inventory (i.e., backordered SKUs) in the Filter by SKU Information criteria box.
NOTE: You can also use the Backorder Report under Reporting > Report center > Backorder Report to identify backorder SKUs organized by order # and SKUs. |
|
3 |
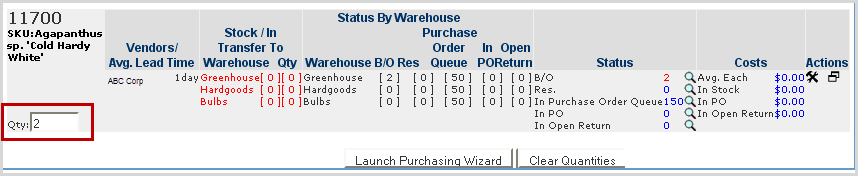
For each SKU, locate quantity of backordered units under the Status column.
|
|
4 |
Enter the Quantity desired for each SKU into the Qty field for each SKU and click the Launch Purchasing Wizard.
|
|
5 |
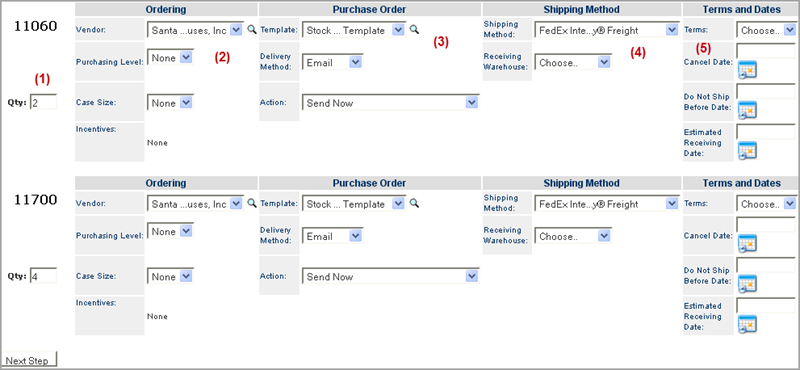
Verify options for each section is correct as described in the steps below.
|
|
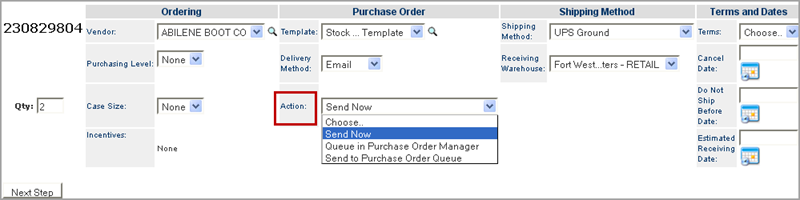
6 |
From the Action drop-down, choose one of the following options: Send Now - the PO is transmitted to the vendor immediately. Send to Purchase Order Queue - the PO is saved in the PO Queue for future release.
|
|
7 |
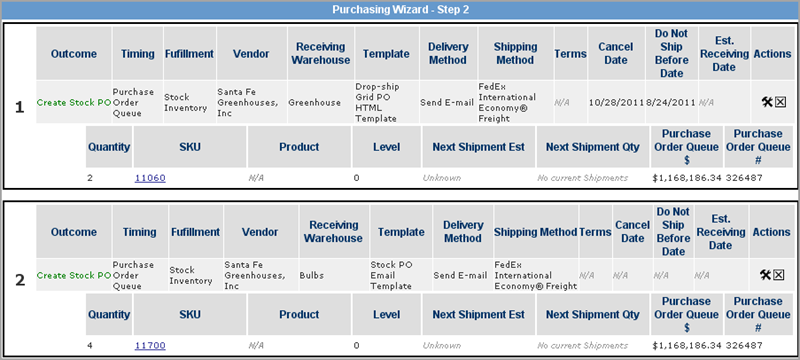
Click Next Step to review the SKU detail information for the PO. |
|
8 |
Review the information and click the
|
|
9 |
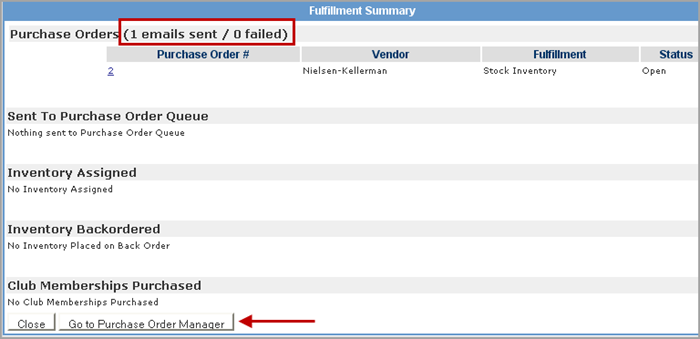
The Fulfillment Summary identifies how many emails were sent to vendors and if any failed. Click Go to Purchase Order Manager to mange the PO.
|
|
10 |
Got to Manage Purchase Order process. |
© 2023 CORESense · info@coresense.com · 125 High Rock Avenue, Saratoga Springs, NY 12866