![]()
![]()
The Journal Entry Export Manager is used to export journal entry level data in a .CSV format that can be used for and accounting system that accepts a .CSV file. For QuickBook users, you will need to use Transaction Pro Importer (TPI) 4.0 (or higher) from www.baystateconsulting.com to convert the data into QuickBooks format. You need to have QuickBooks and Transaction Pro Importer running on the same PC.

The Journal Entry Export process includes the following steps:
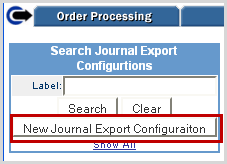
To create a new configuration, click on the New Journal Export Configuration button. The configuration screen is where you determine what type of data you want to export Merchandise Sales and COGS, Shipping Sales and Costs, Gift Certificates and Values Cards, Sales Tax, Payments, or Accounts Receivable. Multiple configurations be can be created based upon brands or channels as needed, or they can be grouped within a single configuration.

Once you initiate a new journal entry configuration, there are four main sections associated with an export configuration that are accessible via the links at the top of the active configuration. Click on a link to access the section's details.

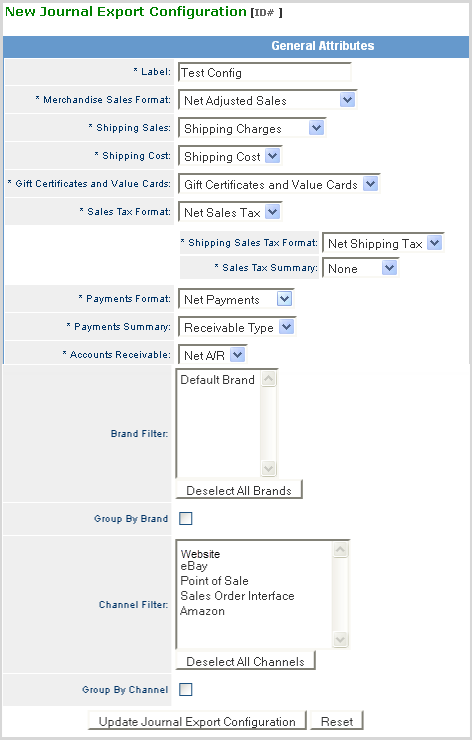
The General Attributes section is used to configure the export file. The required(*) fields must be completed as described in the table below.
Tip: Click on a required field on the image below to "jump to" its specific details. You can also reference the Financial Definitions table to identify definitions for all CORESense financial fields.

User defined label for the export configuration that is used to locate the export configuration. It is recommended that you include any information relevant to the selection or management of exports in the Label such as revision date.
Determines how merchandise sales data is presented in the export. The table below details each option and their supporting elements.

|
Option |
Elements |
|
Net Adjusted Sales |
Presents the data as follows:
|
|
Adjusted Sales and Returns |
Presents the data as follows:
|
|
Net Sales |
Presents the data as follows:
Additional options to group the sales data as follows:
Sales Summary which provides the option to group the data by:
Promotions Summary which provides option to group promotion data by:
|
|
Sales and Returns |
Presents the data as follows:
You also have the option to group the Sales data by Sales and Promotions as follows:
|
None does not include Shipping Sales in the export file
Net Shipping Charges sums Shipping Charges and Returned Shipping Charges into one row in the export file.
Shipping Charges breaks out Shipping Charges and Returned Shipping Charges into two rows in the export file.
None - does not include Shipping Cost in the export file
Shipping Cost - includes Shipping Cost and Shipping Expense (Set equal to Shipping Cost) in the export file.
Purchases of Gift Certificates and Value Cards.
Refunds by Gift Certificate or Value Card.
Redemptions of Gift Certificates or Value Cards in an Order.
Note: It does not include the issuance of Gift Certificates or Value Cards as Credits.
None does not include Sales Tax in the export file
Net Sales Tax sums Merchandise Sales Tax and Returned Merchandise Sales Tax into one row of export file.
Sales Tax breaks out Merchandise Sales Tax and Returned Merchandise Sales Tax into two rows in the export file.
You also have the option to group the Sales Tax data as follows:

Shipping Sales Tax Format
Net Payments - sums Order Payments and Return Payments into one row in the export file.
Order Payments - breaks Order Payments and Return Payments out into two rows in the export file.
You will also be presented the option to group the payment data by:
Note: If you are mapping to an accounts receivable account type in QuickBooks, the Accounts Receivable line in the export must have a “customer” name in the Name column of the export sheet. Currently, this can only be done manually after the file is generated by CORESense. This “customer” must also exist in QuickBooks. Alternatively, Accounts Receivable can be mapped to a generic liability account in QuickBooks in which case a “customer” name is not required.
The Brand Filter provides the ability to select one or more Brands to explicitly include in the export.
To select a Brand, click on that Brand. To select multiple Brands, hold down the <Crtl> key and select all the Brands you want to include in the report.
The Group by Brand option summarizes the data by Brands. There is one row per selected General Attribute for each Brand included in the export. The Brand name is included in the Class column of the Export and maps to Class settings in QuickBooks. Class Tracking in QuickBooks is a way to break down a business into different segments so that profit and loss statements can be generated for each segment.
Note: The Brand label in CORESense must match exactly to the corresponding Class name in QuickBooks.
The Channel Filter provides the ability to select one or more Channels to include in the export. To select a Channel, click on that Channel. To select multiple Channels, hold down the <Crtl> key and select all the Channels you want to include in the report.
The Group by Channel option summarizes the data by Channels. There is one row per selected General Attribute for each Channel included in the export. The Channel name is included in the Class column of the Export and maps to Class settings in QuickBooks. Class Tracking in QuickBooks is a way to break down a business into different segments so that profit and loss statement can be generated for each segment.
Note: The Brand label in CORESense must match exactly to the corresponding Class name in QuickBooks.
When Brand and Channel are both checked, the export includes one row per selected General Attribute for each Brand and Channel combination included in the export.
Note: The Channel label Brand Label combinations generated in the export must match exactly the corresponding Class name in QuickBooks.
© 2023 CORESense · info@coresense.com · 125 High Rock Avenue, Saratoga Springs, NY 12866