![]()
![]()
The instructions below follow the steps required to place an order using the Sales Order Interface (SOI) for retailers that are setup for single ship-to orders only. Refer to Create a Multiple Ship-to Order for instructions if you are setup for multiple ship-to addresses.
|
Step |
Action |
|
1 |
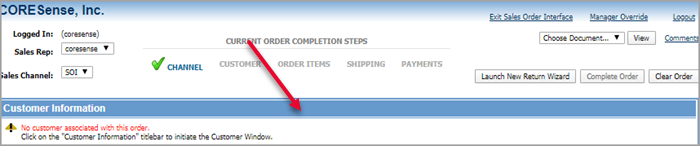
Login to the SOI click on the Customer Information title bar to search for the customer record.
|
|
2 |
Enter the search criteria in the fields provided and click on the Search Customer button.
|
|
3 |
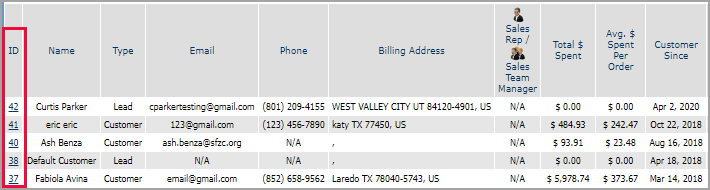
Click on the ID link of the matching customer to verify their address information.
|
|
4 |
Verify the customer address information or select an alternate address from the either or both the Billing and Shipping side. Click the New Contact button to enter another address to the record.
|
|
5 |
After confirming the correct addresses, click on the Apply Customer to Order button. |
|
6 |
Once the customer has been assigned, click on the Order Items title bar to begin selecting products.
|
|
7 |
In the Search Products tab enter criteria on the product to be ordered and click the Search Products button.
|
|
8 |
Click on the product(s) to be added to the order.
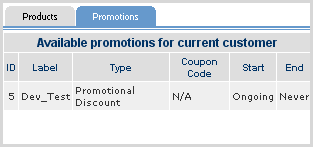
Tip: To view any current promotions, click on the Promotions tab to see the list (view sampleview sample). Promotional list sample:
|
|
9 |
Enter the desired quantity and click on the Add Products to Order button. The other tabs are described below.
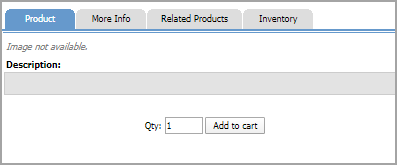
More Info - Provides additional product description and attributes Related Products - Lists any Cross Sell or Up Sell products for the selected item Inventory - Provides a current In Stock Quantity and Backordered across all warehouses
Note: Backordered quantities are cited when an order requests more than what is currently available. For example, if 15 are ordered but only 10 are available, the system displays 5 Backordered. Because inventory and reservations are constantly changing, this should be taken as an estimate. The actual quantity that will be backordered (if any) is determined during the next order automation run. |
|
10 |
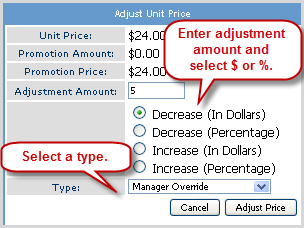
Verify the item(s) being ordered. If all items are correct, click the Close Window link to return to the SOI main screen. If you need to adjust the Unit Price, click on the link. Click here to view adjustment pop-upClick here to view adjustment pop-up. Unit Price Adjustment
|
| 11 |
Specify Take Now, Ship Later from, or Transfer from Fulfillment. |
|
12 |
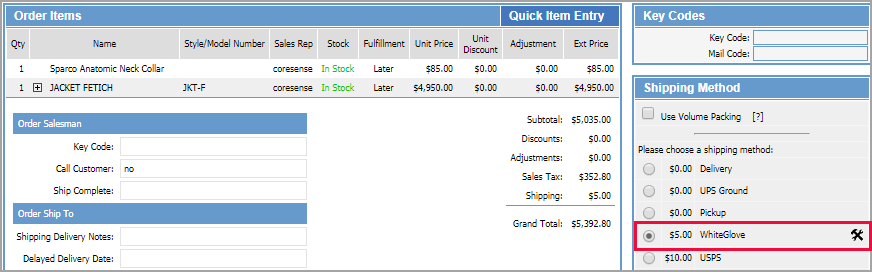
The items now display in the Order Items box. Select the desired Shipment Method for the order. To edit the shipping option once selected, click on the
|
|
13 |
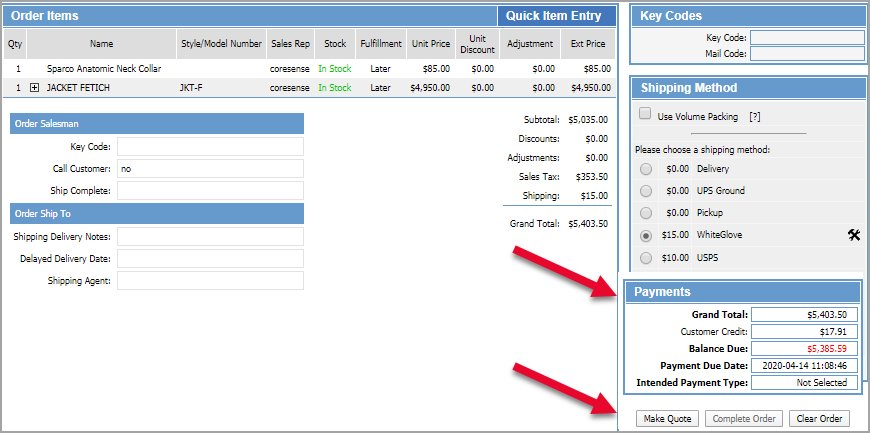
Click on the Payments title bar to begin the payment process.
Tip: If the customer wants a quote of the order, click the Make Quote button to save the information for future payment, which then sends an email to the customer with the pending order details. |
|
14 |
The Payments screen is comprised of the following six areas as described below.
|
|
15 |
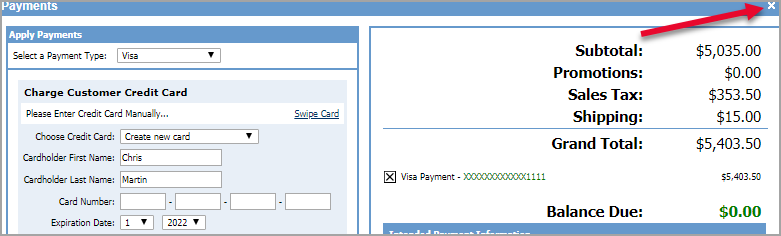
Select the Payment Type from the drop-down list (multiple payment types can be applied to a single order). The Order Summary updates the payment and the Balance Due displays a $ 0.00. Click on the X to return to the main screen.
|
|
16 |
Click the Complete Order button to submit the order for processing and tracking in the CORESense Back Office.
|
|
17 |
Select the SOI Confirmation Email from the Template drop-down and click Send Email.
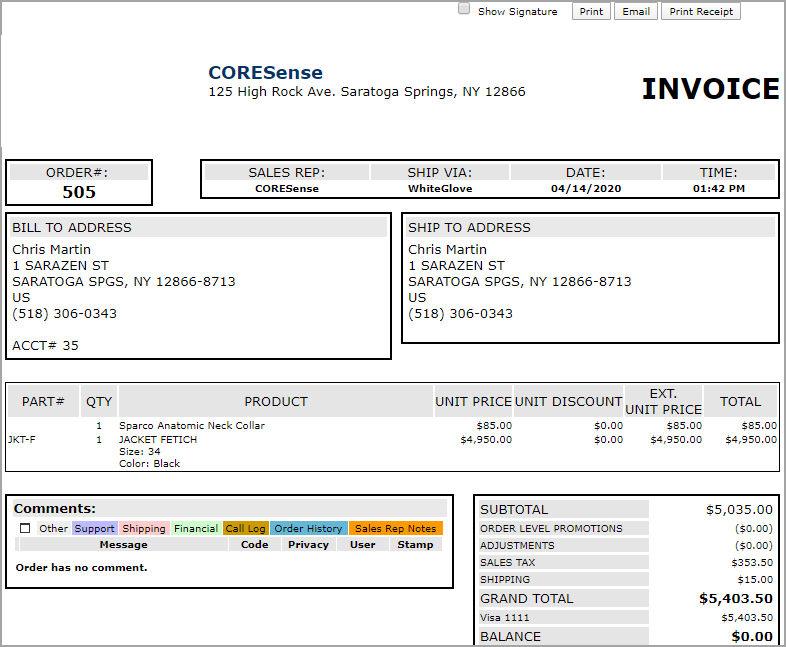
Note: If your SOI was configured for the Invoice format, you will be presented with the final invoice and provided the option to add comments, print and/or email it to the customer. See sampleSee sample. Sample Invoice Format
|
© 2023 CORESense · info@coresense.com · 125 High Rock Avenue, Saratoga Springs, NY 12866