![]()
![]()
This feature allows you to create multiple purchase oeders having the same general attributes, items, prices, and vendor for diferent locations. This functionality is used with Locaiton Hierarchy to create purchase orders at the Chain, Region or District level and identify the quantities for each warehouse location.
Follow the steps below to generate a Master PO for a chain of stores.
|
Step |
Action |
|
1 |
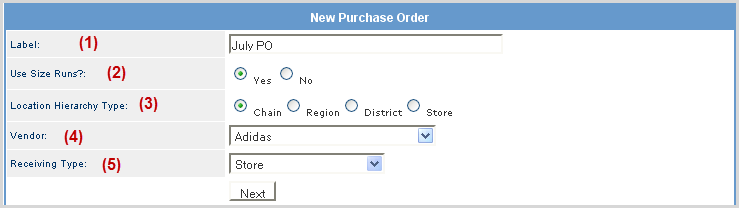
From the PO Builder enter the information for the PO as described below. Click Next button to continue.
Label: This is an internal reference name. Vendor: Select vendor to purchase from. Use Size Runs?: Identify whether to use size runs (reference size run setup). A Size Run designates quantities of specific product configurations associated to the parent Grid. If you do not use a Size Run, you will manually populate quantities for each SKU in your PO. Location Hierarchy Type: Use the corresponding radio button to determine whether you are building a PO at the Chain, Region, District or Store level. Receiving Type: Identify the location type that is to receive the inventory, this is typically either store or central distribution level. |
|
2 |
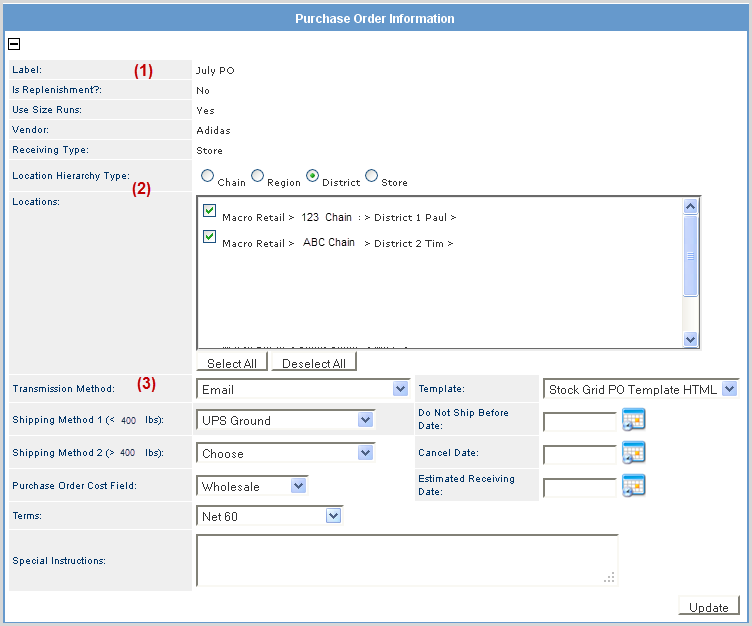
The PO Information screen includes three sections:
|
|
3 |
Click Update to save the information. Once updated, you can begin to add products to the PO. |
|
4 |
Click the
|
|
5 |
Verify that your Vendor field reflects the PO vendor and click on Search button. Click on the product to add to the PO from the Search Results and the product is automatically added to the Product ID field. |
|
6 |
Click on the Add Product button to add the selection to the PO. Continue to add products as needed.
|
|
7 |
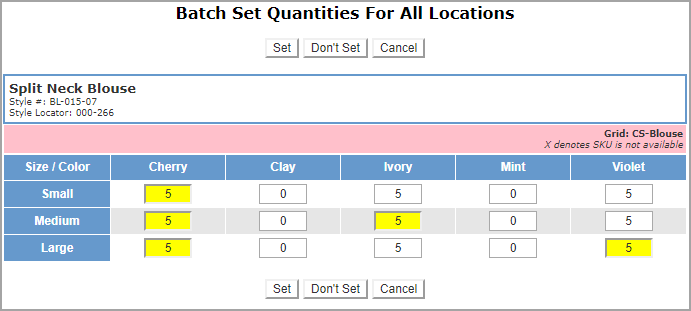
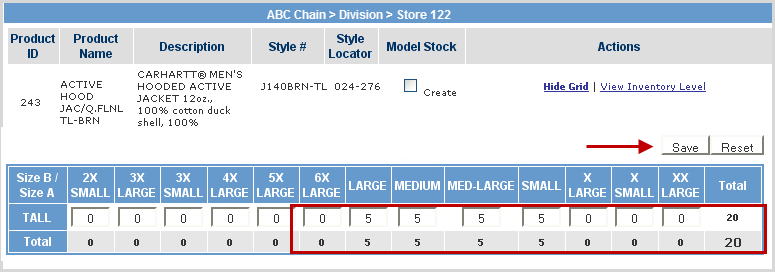
The Batch Set Quantities window allows you to enter quantities for the sizes available. The action buttons provide the following options:
Note: Quantities can be added in the final step by clicking on either the View Size Run or View Grid links. |
|
8 |
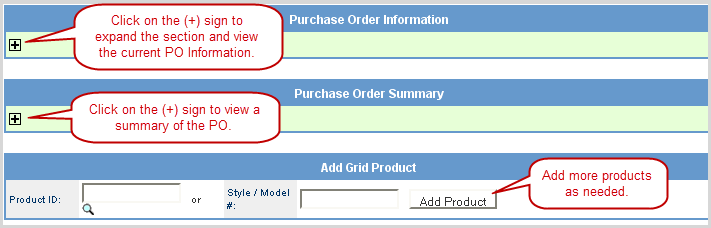
The PO information screen is now organized into the following sections.
|
|
9 |
The buttons across the top of the PO Builder provide the following options:
|
|
10 |
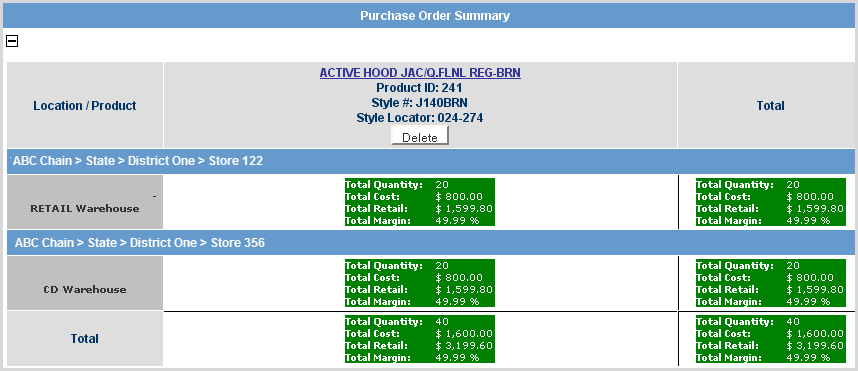
Expand the Purchase Order Summary section to view the details of the order for each location.
|
|
11 |
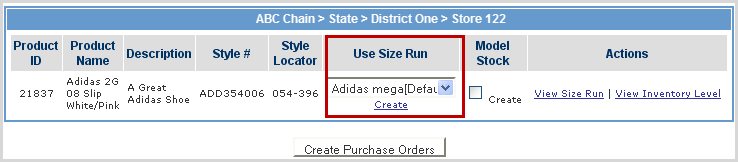
If you created PO with Size Runs, select one from the drop-down list. If no runs are available, you can create one by clicking the Create link.
|
|
12 |
You can perform other actions at this point for each location:
|
|
13 |
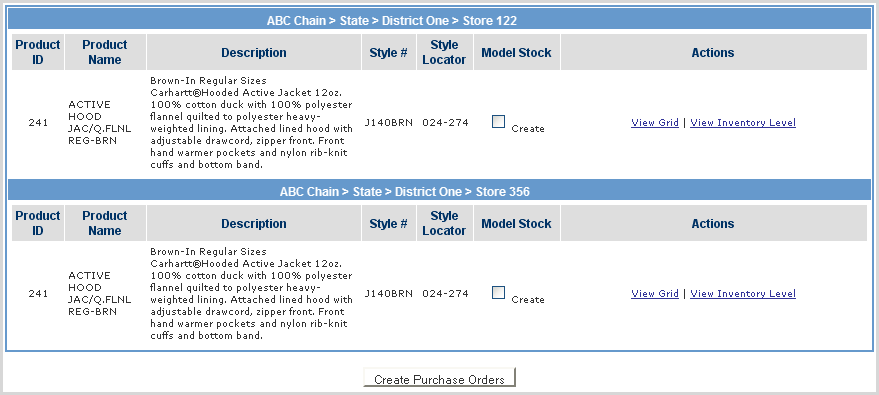
Click Create Purchase Order at the bottom of the screen once all your products have been added. |
|
14 |
The system prompts you to confirm the PO creation. Click OK and the PO moves into the Purchase Order Manager. |
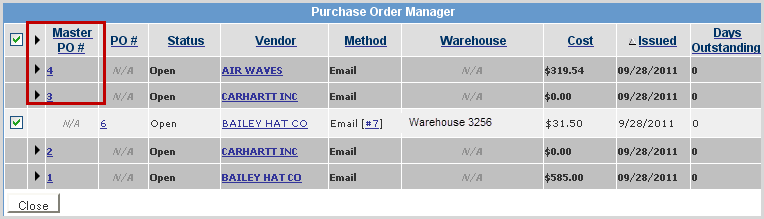
The PO Manager lists both Master POs and Individual POs. Individual POs are nested below the Master in the PO Manager and are accessible by clicking the  expand icon of the Master PO. All POs generated for only a single location are listed separately under the PO# column of the PO Manager. The Label field identifies the name assigned to the PO when it was created.

Follow the steps below to manage a Master Purchase Order.
|
Step |
Action |
|
1 |
Click on the desired Master PO# link.
|
|
2 |
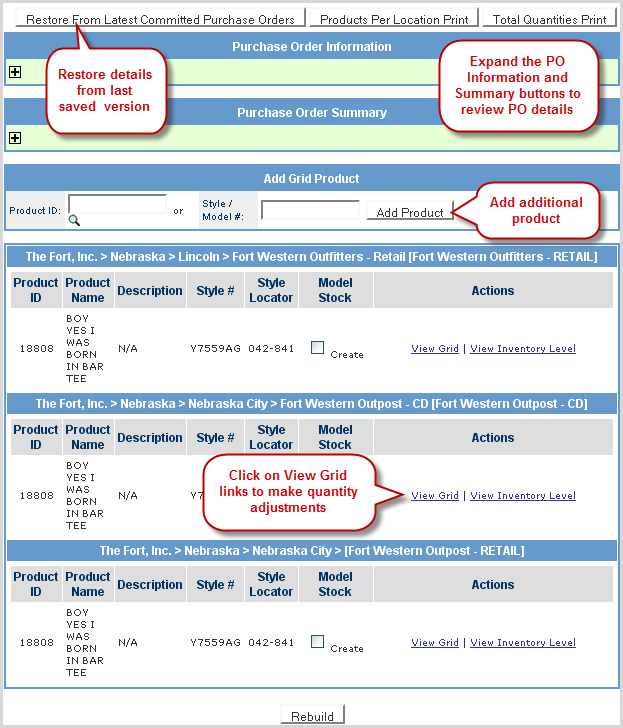
The PO Builder displays allowing you to make any necessary adjustments to the PO.
|
|
3 |
Once all changes have been made, click on the Rebuild button to process the Master PO. |
|
4 |
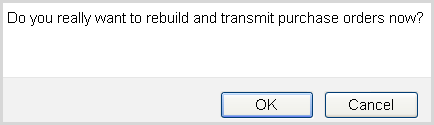
The system prompts you to verify rebuild. Click OK to transmit the PO.
|
© 2023 CORESense · info@coresense.com · 125 High Rock Avenue, Saratoga Springs, NY 12866