![]()
![]()
Purchase orders for all products can be initiated using either the Purchasing Manager or the Purchase Builder located under the Inventory tab.
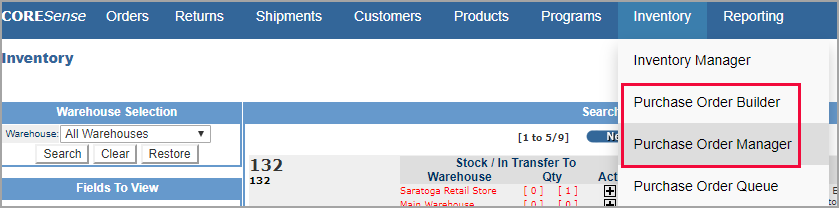
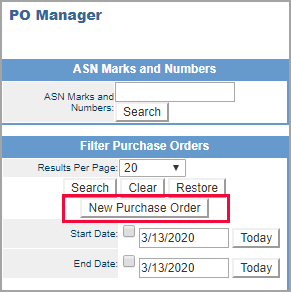
When selecting the Purchase Order Manager, you need to click on the New Purchase Order button, which will open up the Purchase Order Builder screen.
Follow the steps below to create a grid product purchase order.
|
Step |
Action |
|
1 |
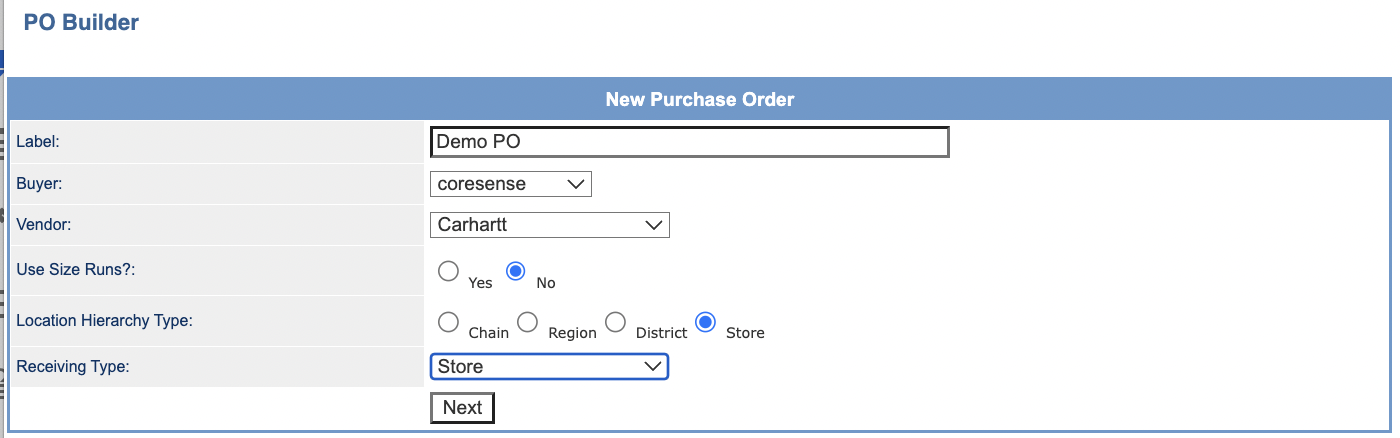
From the PO Builder enter the information for the PO as described below.
Label: This is an internal reference name. Buyer: The user alia doing the buying. Can be used in searches in the Purchase Order Manager. Vendor: Select vendor to purchase from. Use Size Runs?: Identify whether to use size runs (reference size run setup). A Size Run designates quantities of specific product configurations associated to the parent Grid. If you do not use a Size Run, you will manually populate quantities for each SKU in your PO. Location Hierarchy Type: Use the corresponding radio button to determine whether you are building a PO at the Chain, Region, District or Store level. Receiving Type: Identify the location type that is to receive the inventory, this is typically either store or central distribution level. |
|
2 |
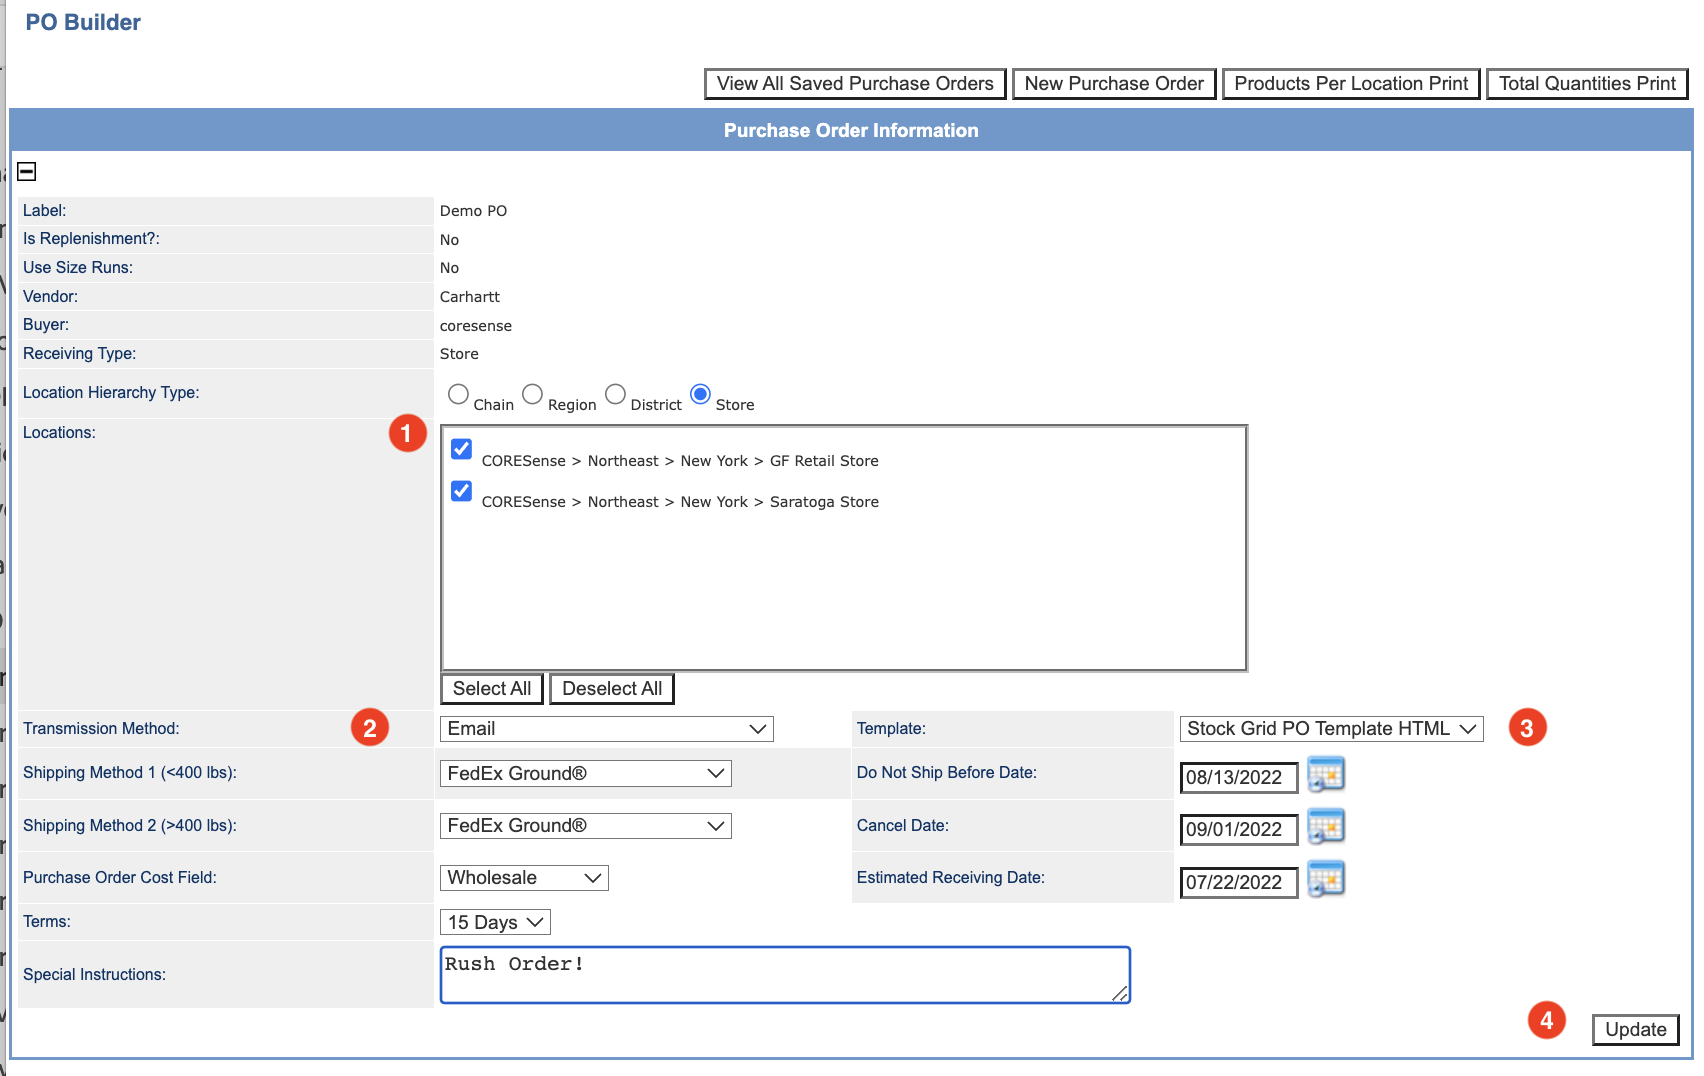
Adjust the additional PO information as needed.
|
|
3 |
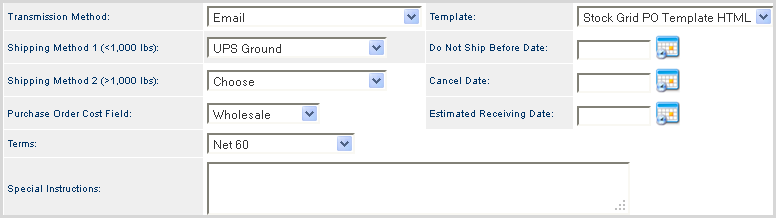
Each of the logistic fields are described below.
Transmission Method - Use the available drop-down list to choose how the PO is to be delivered. Methods available are e-mail, print, fax and EDI. Shipping Method – The drop-down lists all available possibilities. Purchase Order Cost Field -- Select Wholesale Cost, Discounted Cost, Replenishment Cost, Manual Override. This is the cost that is listed on the PO. Terms – Use the drop-down list to select the proper time period. Special Instructions – Add any additional information about the PO in this text field. Template – Choose the appropriate template to be used from the drop-down list (HTML or Plain). Do Not Ship Before Date – The earliest date on which an item can be shipped to a customer. Cancel Date – The date a PO is cancelled. Estimated Receiving Date – The date merchandise should be received. |
|
4 |
Click the
|
|
5 |
Verify that your Vendor field reflects the PO vendor and click on Search button. Click on the product to add to the PO from the Search Results and the product is automatically added to the Product ID field. |
|
6 |
Click on the Add Product button to add the selection to the PO. Continue to add products as needed.
|
|
7 |
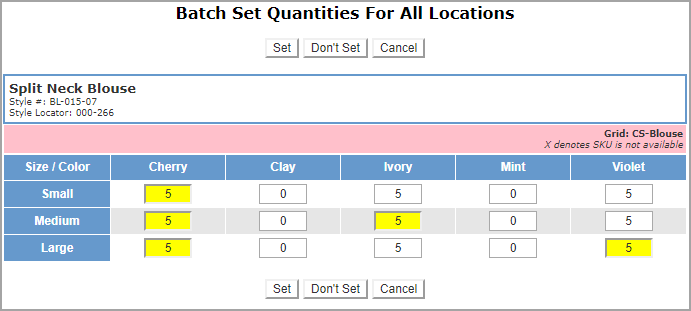
The Batch Set Quantities window allows you to enter quantities. The action buttons provide the following options:
Note: Quantities can be added in the final step for Grid prodcuts by clicking on either the View Size Run or View Grid links. |
|
8 |
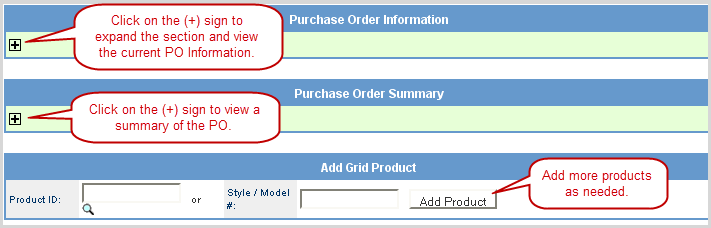
The PO information screen is now organized into the following sections.
|
|
9 |
The buttons across the top of the PO Builder provide the following options:
|
|
10 |
If you created PO with Size Runs (Grid products only), select one from the drop-down list. If no runs are available, you can create one by clicking the Create link.
|
|
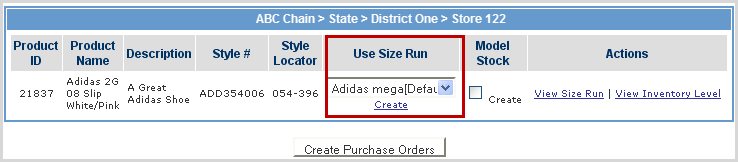
11 - Grid products |
For Grid products, you can perform a few other actions at this point:
|
|
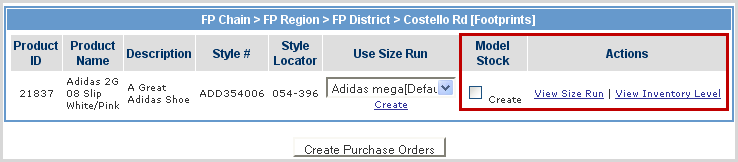
11 - non-Grid products |
For non-Grid products, you can perform a few other actions at this point:
|
|
13 |
Click Create Purchase Order at the bottom of the screen once all your products have been added. |
|
13 |
The system prompts you to confirm the PO creation. Click OK and the PO moves into the Purchase Order Manager. |
© 2023 CORESense · info@coresense.com · 125 High Rock Avenue, Saratoga Springs, NY 12866